
Let me back up.
Nearly fifteen years ago, Dave and I moved to Boston (well, Somerville). Dave had just graduated from Oberlin, and I was a year out of UGA. He was headed for an internship at the Museum of Science (that would lead to a full time job) and I was about to start an English Ph.d. program at Brandeis (that would lead to me quitting when Ari was born). We were young; we were full of dreams.....like the dream of finding an apartment we could afford that would take dogs.
Once we secured said apartment (we walked into the rental agency with dog in tow, and the woman said, "where do you want to live? ANYWHERE with a dog, right?" ....which was sort of the perfect introduction to Boston in a couple of ways...we took the one apartment in the greater Boston area in our price range that allowed a dog), we did some touristy things. Like visiting Paul Revere's house and the Old North Church.
None of this really matters, except that, since I don't have a successful project to show you, I might as well tell a story. And also because the Old North Church's gift shop is where we bought a reproduction of an old map of/aerial view of Boston. I don't know why. Apparently our younger selves didn't know why either, because it stayed just how we bought it, rolled up in a tube, for nearly fifteen years.
A couple of years ago we found it somewhere or other and moved it into Ari's room at our old house, thinking we'd frame it and hang it up in there. And then it sat in the tube for awhile longer.
Then we started redoing Ari's room here, and the map of Boston still seemed like it would be a good fit. And Ari was born in Boston and all, so, you know....perfect!
Instead of buying an expensive frame for it, I had a brilliant plan. We would cut down some wood (I can't remember what they called the stuff we wound up with at Home Depot--craft board? project board? It was cheaper than plywood but more amenable to painting than MDF) to the size of the map and then the map and the board would become one with the help of some spray adhesive and Mod Podge.
Things started out just fine. I painted the edge of the board with some of the red paint left over from Ari's subway dresser (Boston HAS a subway! How fitting!):
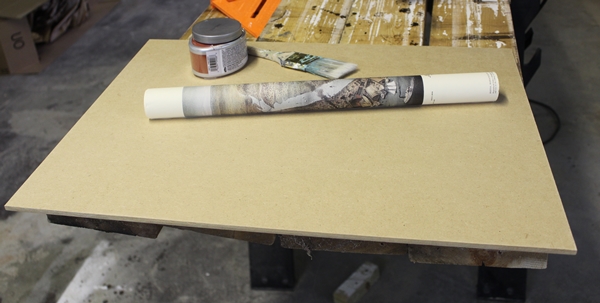

I let the paint dry overnight, then Dave and I went down to consider how to proceed. Since the poster had been rolled up for more than a decade, we decided to weigh it down for awhile before gluing it. Dave was very skeptical at this point about our ability to get the map lined up right on the board. I, however, was confident. Yes. Confident.

We came back down a couple of hours later (AKA the next time Abe took a nap) and started gluing. First Dave sprayed on a strip at one edge and I got that side pasted down. Then he sprayed the rest and we slowly pressed it down all the way across.
And now I was feeling triumphant, because it looked AWESOME:

Look at that! No wrinkles! Lined up perfectly! It looked GREAT!
I was feeling pretty full of myself at this point. I was right, and Dave was wrong. THIS was going to be the project that finally got me on Craftgawker (oh, yeah, and it was going to look nice in Ari's room). The red edge was subtle yet the perfect touch:

I went upstairs to bask in my own awesomeness for awhile and let the adhesive dry.
Then I came back down and confidently started to put the Mod Podge on the top. Umm.
It was not good. It immediately started wrinkling and bubbling and coming up from the board. I frantically grabbed whatever I could find with a straight edge and tried to straighten it out and get it to stick again. No use. I went back upstairs and hoped everything would look better when it dried. No:

Sigh. Looking at the pictures kind of breaks my heart. I'm very sorry, Map of Boston (and Ari).
Where did I go wrong? My best guess is with the spray adhesive step. It all seemed perfect at the time, but, in retrospect, I guess we should have used more of the stuff, given how readily it started to peel off as soon as something wet touched it. Or maybe it would have been okay if I'd waited longer to Mod Podge it.
I'm not sure if I'm ready to give up yet. I mean, I have to give up on THAT map. But we have more of the board left; I might just have to buy or print a map of Boston and give it another shot.
So there you have it. Failure! Tomorrow (or so) I'll be back with another, less disastrous weekend project to tell you about.
Awww that is unfortunate. My money would be on the spray adhesive. Aren't you supposed to use modge podge on both sides of something (like I'd know- I've never actually modge podged anything)
ReplyDeleteI thought about using mod podge instead of the spray adhesive, but, ironically, I thought it would be more likely to make the paper wrinkle and bubble. We used the spray adhesive on the nursery bookcase with much success...but nothing had to go over the top of that. I wonder if a spray sealant instead of the mod podge would have worked better? I wonder if I should have actually researched how other people have done similar things before I started instead of being cocky and thinking I could totally figure it out on my own?
DeleteOh no! I've had some project fails this weekend too - I'm hoping I can still salvage mine - but they also involved adhering photos to solid surfaces. (I was attempting to do DIY photo transfers onto canvas.) Instead today I posted about dyeing the rattan chairs' slipcovers (only about 2 weeks after I actually did it).
ReplyDeleteSaw your sneak preview on instagram...hope it's going better now!
DeleteOn the blog today. I managed to salvage it, but only because I was using laser printed photos, so when I ruined a photo, I could just trash it and print another one.
DeleteOH NO! I hate DIY fails. They are the worst. Especially the wrinkly kinds. That has definitely happened to me before. It happened the first time I tried to mod podge that map in the basement. Sometimes fails just happen. And then we cry. And then we drop kick the project into the trash and try again.
ReplyDeletenow, see....your map is one of the things I should have re-read about for tips and cautionary tales before I attempted this!
DeleteHi there!! I just wanted to let you know that I nominated your blog for the Leibster Award! You can read the post here.
ReplyDeletehttp://furniture-ology.blogspot.com/2013/04/weve-been-given-leibster-award.html
We are also new followers of yours. Follow back if you'd like :)
Steve & Meg @ {Furniture-Ology}
Thanks so much, guys!
Deletebummer! Maybe you can lightly sand it so it looks intentionally imperfect and old? It might worth a shot...? Also, how have your projects never been on craftgawker? Not even your fabulous whale??
ReplyDeleteI dunno...I thought about going with the "it's old! it's supposed to look that way!" trick....but I'm not sure it's salvageable. And, no, not even my whale. I've tried, believe me! The whale is really, really hard to photograph--dark wood on a dark wall. My camera doesn't know how to handle it, and I'm not skilled enough to help it--at least not to craftgawker's satisfaction.
DeleteDang Nabbits. I wish I could have favorited this project over on CraftGawker too! I do love your story telling though... So I still consider it kind of a win.
ReplyDeleteI have a tube of a rolled up poster just like yours. Also pushing 15 years... I took it out two weeks ago with every intention of framing it. It's still sitting in the garage... oh well...
Yes, all things considered, it's good I let the poster sit around for 15 years, since at least it makes for a better story ;)
Deleteyou know we Boston folk refer to it as Slum-erville, right? :)
ReplyDeleteAnywho, that's a real huge bummer. Maybe you can just roll with the wrinkles... it's "distressed" and "artsy." All the hipsters are doing it...
Ha! Not even Davis Square or anything....over by Sullivan Square. So I'm probably not hip enough for an artsy, distressed map ;)
DeleteOk lady...do not give up on this one! I think you need to send off for another map of Boston and give this one another go! It looked fantastic and I think the meaning behind the map of Boston is so wonderful for his room! Go get em girl!
ReplyDeleteRight back on that horse, right? I actually googled the Old North Church gift shop last night to see if they sold stuff online, but they're closed for renovations! Probably they sell maps of Boston other places, too, though ;)
DeleteThis has happened to me. I'm pretty sure the problem is trapped air under the paper. If you don't reeaally press the paper down as you apply it (really well), then for some reason the mod podge brings out those bubbles. :( Pretty unfortunate since it was a keepsake. But you should def try again with a new map.
ReplyDelete