Showing posts with label Ari's room. Show all posts

Tuesday, May 28, 2013

Ari's Room: All Finished! Rustic-Industrial Tween Room


All done! This one took us a little longer than the nursery, since Ari was already born and there was no built in deadline....but I'm really pleased with how it turned out. And, almost as even more importantly, Ari is, too.  And now for the long post with tour and sources for everything. (I guess it would be more exciting if I did things the opposite way: did a big room reveal first and then went back and did individual posts about all the projects. But I am not nearly patient enough for all that. Plus there'd be like 4 months where I didn't have anything to blog about. I saved a few little things for the big reveal, though).

So here is the room back before we moved in:


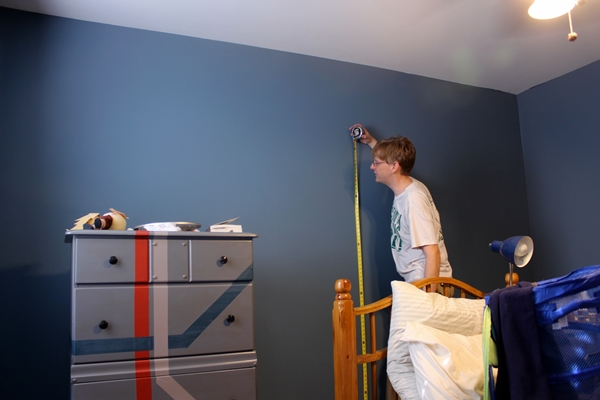
And here it is a few months ago, right before we started working on it (we'd painted--Ari picked the color--before moving in). The original plan was much less ambitious and mostly involved painting furniture. But we got a little carried away:
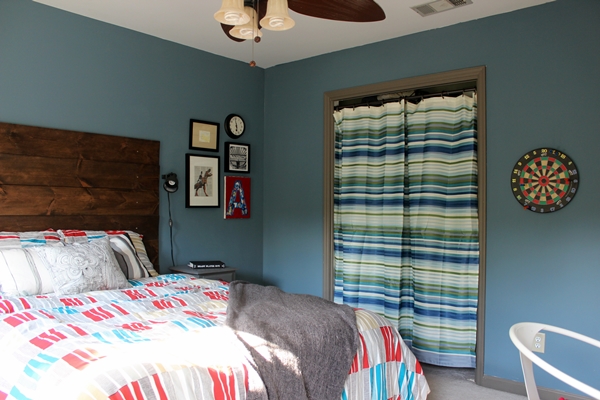

And now:


I'll go wall by wall. On that wall we have the plank headboard that we made and the vintage bedside table we painted.

I was supposed to make a no sew bed skirt for Ari's bed, but....I just couldn't. It made me very tired and sad to think about. It would not have been hard, just tedious, but I'm just burned out on making no sew stuff and I was ready to be finished in here. So I went to Target and bought a fitted sheet to put over the box spring instead. Now I have seven yards of gray fabric to find something to do with.


He's very into Portal 2 these days and found this poster online, of Portal 2 if it were a 70's sci-fi movie. I thought it was pretty cool, too, and we needed something for that wall, so I ordered it.


I talked about this grouping of pictures here.

Sources:
paint: Martha Stewart's Kerry Blue Terrier (Home Depot), trim is MS's Brook Trout
bedding and pillows: Ikea
lamp on wall next to bed: Ikea
Portal 2 poster: valvesoftware.com
poster frame: Hobby Lobby
paint on bedside table (and desk and dresser): Valspar High Speed Steel
knobs on bedside table (and desk): Hobby Lobby

Moving along:


My mom found the vintage fan at a yard sale. We're planning to rewire it so that he can actually use it.

We painted the dresser with a stylized subway map design and made the curtains and curtain rods.

Sources:
Curtain fabric: "gray canvas" from Fabric.com
Union Jack box: TJ Maxx
Bing Bong print: Ikea
silver ribba frames: Ikea
Tabouret chair from Overstock.com with Ikea cushion
Tokyo skyline print from Loose Petals on Etsy

Next wall!


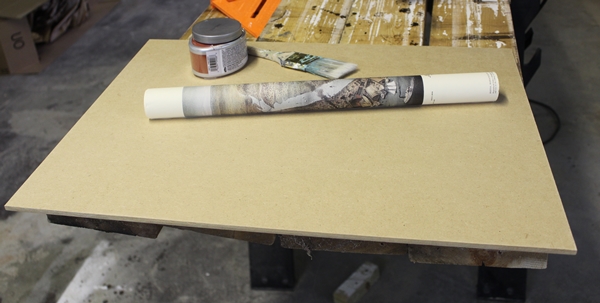
We made the London skyline out of plywood. We redid the desk with paint and stain. No new sources to speak of on this wall, really.

And, finally:


That's not a real dart board; it's Doink It darts. Magnets, not pointy things. We took the bifold closet doors down awhile and put that shower curtain (from Target) up instead. I'm not super crazy about it in here, but Ari wanted it to stay. I think I'd prefer putting the doors back, painted brown like the trim. But, you know, it's not my room. Behind the curtain there's a cabinet from Ikea for storage and.....a lot of stuff. But it's all behind the curtain! yay!

And that completes our tour. Here is how Ari feels about his new room. He says to say it's, "Ari approved."


Linking with:
Craftionary's Friday Link Party
Inspiration Gallery
The Shabby Nest's Frugal Friday
Tatertots and Jello's Weekend Wrap Up
Monday Funday
By Stephanie Lynn's Sunday Showcase Party
Home Stories A to Z's Tutorials and Tips
Tuesday's Treasures at My Uncommon Slice of Suburbia
Stone Gable's Tutorials, Tips, and Tidbits
Hookin' Up With House of Hepworths
Before and After Competition with One Project Closer
Thrifty Decor Chick's August Before and After

Thursday, May 23, 2013

Ari's Room: We Hung Stuff on the Wall


Just a quick post about this little grouping of pictures next to Ari's bed, then we finish up a couple of things this weekend, and we're done! I think the sun room is going to get some more attention next. 

Okay, so on the list I posted the other day, this was referred to as a gallery wall, but really it's a gallery wall light at best. We have these on one side of his bed:


...and the thing that's going on the other side just got here today (I'm saving a few surprises for the room tour next week). 

First up we have....Abe Lincoln on a T-rex of course!


I bought this back before we moved, but after we knew we'd be living here. I had some vague big ideas in my head about it, something about mixing traditional style with quirkiness, blah, blah, blah. We had this big plan to make it part of a big grouping of totally normal pictures in some more public part of the house. And then people would come over and we'd all be hanging out, and then they'd suddenly notice it, and be all, "OMG: is that Abe Lincoln on a T-rex?!" And we would say, "why yes it is!" But then I told everyone who was likely to come over the plan before we could implement it (Dave was very annoyed with me), and anyway the colors didn't wind up really fitting in most of the downstairs. And then I wanted to hang sentimental stuff from Ari's babyhood on his wall, and he didn't want me to because he's so OLD now, so I used Abe Lincoln on a T-rex as a bargaining chip. He got it in exchange for the big A and the lion. 


The big A! I made this collage-y thing when Ari was a baby. It has stuff from a Where's Waldo book on it, including a lion, because Ari's name means lion.


...which also explains this one. This was the tag from a baby shower gift that one of the people from my department in grad school gave us. I loved it so much that I saved it forever.


We found this clock (Michael Grave's Target), brand new in the box, for $4 at the thrift store a few weeks ago.


Also a thrift find. I don't know what it is, but I like it here.

Tuesday, May 21, 2013

It's Just the London Skyline, Ah Sweetheart.....


It's an Indigo Girls reference. Get it? In a bit of poor timing, I had Strange Fire in the disc changer in my car for awhile just before I did this project, and now I can't get that song (or at least that line) out of my head.

I came up with the idea for this project one day while I was in the shower, which is, historically, where I get all my best ideas (I used to compose entire paragraphs of papers there when I was in grad school. Of course, the problem with composing paragraphs in the shower is that you have to memorize them and keep them in your head until you get to a computer). The thought process went something like this: "hmm....maybe a skyline of some sort for Ari's wall? Like the thing from the beginning of Frasier...the outline of Seattle. But not Seattle. Where? Atlanta? Because we live here? Boring. Paris? Eiffel tower? Too hard. ......London? London Eye! Yes! Also with string!"

This was back when we were first starting on Ari's room makeover, and I've spent a lot of time since then fretting that the end result would not match the vision in my head. I dealt with this anxiety by putting it off as long as possible instead of just doing it already and getting it over with. I think it's probably good that we waited until after the big Boston map fail, though. Probably we were due for a screw-up, and I'd rather it were that than this.

And....I'm really happy with it! It looks pretty much like it did in my head! yay! Ari loves it, too. Extra yay!

I'll just go ahead and show it to you instead of making you scroll before I get to the how we made it part. I can't wait anymore, because I'm so excited about it.


The materials for this project were a 2 by 4 foot sheet of plywood (around $11), stain (already on hand), a box of tiny nails ($1.50), and 3 skeins (is that the right word? it's such a fancy word) of embroidery thread ($1.20 for the 3). So a total cost of under $14.

We started with the blank sheet of plywood, a picture of a London skyline stencil that I found online, and my rough sketch:


We needed too big of a circle for any circle shaped things we could find in the house (mixing bowls, pizza pans), so we hammered a nail in the center of the future circle, tied a loop of string the right radius to it, and did this:


That's the inner circle I'm making right there. We debated whether to do the compartments on the edge of the ferris wheel, but decided not to. I mean, people don't actually have to ride in it; it's just a wall hanging. And we figured it would be pretty obvious it was a ferris wheel And also it would have been hard to cut out all the little round shaped things with the jigsaw.

Then I did my thing where I sketch and redo all the lines 400 times trying to get it right. Dave went back and marked the practice lines with Xs so he'd know where to cut:


Then down to the basement to cut it out! Dave drilled a hole to get the circle started:


Then cut it out with the jigsaw. In flip flops! Classy!


Then I stained it. I used Varathane Dark Walnut (they were out of the Minwax when we bought it. I think I like the Minwax better).


If this were a whale, we'd have been all done. But we still had to do the string part.

Dave hammered a gazillion little nails in two rows along either edge of the circle. He wrapped a tape measure around it to get the spacing even:


And then we put the thread on (it's hard to tell, but it's a light gray rather than white). We did a criss cross design along the edge and then all the spokes to the middle. This part was tricky at times; it's a little hard to tie the thread to the nails, for one thing. But mostly the problem was with the thread slipping off the nails. We wound up having to put a second nail in the middle, because we couldn't fit any more thread around the first one (this could have been avoided by using a bigger nail just for that center one).


But we persevered!


We hung it up over Ari's desk. For the big plywood whale in Abe's nursery, we used anchor screws. But this one was MUCH lighter since we'd cut so much wood away (and it wasn't going to be hanging right over Ari's bed), so we went with just regular screws and screwed it directly to the wall (we thought about various other hanging techniques, but since it's not a rectangle at the top, our options were limited).

And here it is some more!


We're almost finished in here! I have one more thing to post individually about, and then a few more little, non-post worthy, things to finish up, and then I'm hoping for the final reveal/tour/source list next week. Here's the to-do list we made before we did the skyline (which is referred to as "secret project" on the list, since I didn't know when I'd post the picture):


Ari added "inspected by Lance." He's an odd boy.

Linking with:
Stone Gable's Tutorials, Tips, and Tidbits
Inspiration Gallery
The Shabby Nest's Frugal Friday
Hookin' Up With House of Hepworths
Tatertots and Jello's Weekend Wrap Up
Classy Clutter's Spotlight Saturday
I Heart Naptime's Sundae Scoop Link Party
Monday Funday
By Stephanie Lynn's Sunday Showcase Party
Tuesday's Treasures at My Uncommon Slice of Suburbia
Home Stories A to Z Tutorials and Tips
Time to Sparkle Link Party

Monday, April 29, 2013

DIY FAIL: Wrinkly Map of Boston

This is not just a DIY fail. It is a DIY fail nearly fifteen years in the making.

Let me back up.

Nearly fifteen years ago, Dave and I moved to Boston (well, Somerville). Dave had just graduated from Oberlin, and I was a year out of UGA. He was headed for an internship at the Museum of Science (that would lead to a full time job) and I was about to start an English Ph.d. program at Brandeis (that would lead to me quitting when Ari was born). We were young; we were full of dreams.....like the dream of finding an apartment we could afford that would take dogs.

Once we secured said apartment (we walked into the rental agency with dog in tow, and the woman said, "where do you want to live? ANYWHERE with a dog, right?" ....which was sort of the perfect introduction to Boston in a couple of ways...we took the one apartment in the greater Boston area in our price range that allowed a dog), we did some touristy things. Like visiting Paul Revere's house and the Old North Church.

None of this really matters, except that, since I don't have a successful project to show you, I might as well tell a story. And also because the Old North Church's gift shop is where we bought a reproduction of an old map of/aerial view of Boston. I don't know why. Apparently our younger selves didn't know why either, because it stayed just how we bought it, rolled up in a tube, for nearly fifteen years.

A couple of years ago we found it somewhere or other and moved it into Ari's room at our old house, thinking we'd frame it and hang it up in there. And then it sat in the tube for awhile longer.

Then we started redoing Ari's room here, and the map of Boston still seemed like it would be a good fit. And Ari was born in Boston and all, so, you know....perfect!

Instead of buying an expensive frame for it, I had a brilliant plan. We would cut down some wood (I can't remember what they called the stuff we wound up with at Home Depot--craft board? project board? It was cheaper than plywood but more amenable to painting than MDF) to the size of the map and then the map and the board would become one with the help of some spray adhesive and Mod Podge.

Things started out just fine. I painted the edge of the board with some of the red paint left over from Ari's subway dresser (Boston HAS a subway! How fitting!):


I let the paint dry overnight, then Dave and I went down to consider how to proceed. Since the poster had been rolled up for more than a decade, we decided to weigh it down for awhile before gluing it. Dave was very skeptical at this point about our ability to get the map lined up right on the board. I, however, was confident. Yes. Confident.


We came back down a couple of hours later (AKA the next time Abe took a nap) and started gluing. First Dave sprayed on a strip at one edge and I got that side pasted down. Then he sprayed the rest and we slowly pressed it down all the way across.

And now I was feeling triumphant, because it looked AWESOME:


Look at that! No wrinkles! Lined up perfectly! It looked GREAT!

I was feeling pretty full of myself at this point. I was right, and Dave was wrong. THIS was going to be the project that finally got me on Craftgawker (oh, yeah, and it was going to look nice in Ari's room). The red edge was subtle yet the perfect touch:


I went upstairs to bask in my own awesomeness for awhile and let the adhesive dry.

Then I came back down and confidently started to put the Mod Podge on the top. Umm.

It was not good. It immediately started wrinkling and  bubbling and coming up from the board. I frantically grabbed whatever I could find with a straight edge and tried to straighten it out and get it to stick again. No use. I went back upstairs and hoped everything would look better when it dried. No:


Sigh. Looking at the pictures kind of breaks my heart. I'm very sorry, Map of Boston (and Ari).

Where did I go wrong? My best guess is with the spray adhesive step. It all seemed perfect at the time, but, in retrospect, I guess we should have used more of the stuff, given how readily it started to peel off as soon as something wet touched it. Or maybe it would have been okay if I'd waited longer to Mod Podge it.

I'm not sure if I'm ready to give up yet. I mean, I have to give up on THAT map. But we have more of the board left; I might just have to buy or print a map of Boston and give it another shot.

So there you have it. Failure! Tomorrow (or so) I'll be back with another, less disastrous weekend project to tell you about.

Monday, April 22, 2013

Ari's Room: Plank Headboard (plus new bedding)


When we first started planning Ari's room makeover, I mentioned that we were contemplating either a pallet wall or headboard. I guess the picture above is kind of a spoiler...we went with headboard. I also did enough reading about the potential chemical laden scariness of pallets to decide to play it safe and buy brand new wood instead, seeing as how it was going to be right next to Ari's developing brain and all.

This is what Ari's bed looked like before:


Basic wooden headboard, twin sized bed, sqeaky bedframe....

We wanted something more exciting and he wanted a bigger, less squeaky bed. Right next door, we had a rarely used queen bed in the guest room. The deal we wound up striking with Ari was that he could have the queen bed, but he'll need to give up his room and bunk with a brother or two on an air mattress when we have guests (well, until Abe moves into the guest room, Ari's old bed is in there and he can just sleep there).

This was a pretty simple project. We bought three ten foot long 1x8 whitewood planks at Home Depot. Queen mattresses are 60 inches wide, so we just got each board cut in half at the store so that we ended up with just the right amount of wood--no waste! Each board was $12, and we already had everything else we used (sandpaper, stain, and anchor screws), so the total cost of the headboard was $36.

Dave sanded down the planks and stained them with Minwax dark walnut:


We let them dry and air out for a couple of days.

Then there was the measuring:


Also, look what happened to Ari's dresser! Boo! We have to fix it:


We made sure the first board starts well below the mattress so that you can't see it. Dave experimented with having kids hold the first board level, but it kept slipping, so he built a makeshift plank holder instead:


We used anchor screws to hold it up. This might have been overkill, as the wood is very light, but, again....developing brain!


We considered various possibilities for filling in those screw holes and covering up the screws, but Dave doesn't think the little caps you can buy and sand down will work, and, in our experience, wood putty won't stain to the same color as the wood, and I was afraid it would stick out more with wood putty than with exposed screws. So we're leaving it as is for now. If it bothers us too much, we'll figure something out later.

The other problems we ran into were some gaps in between the planks (one very noticeable one, but not so noticeable once pillows are in front of it) and warped boards not laying flat against the wall. Again, we'll see how much these things bother us before we decide whether or not to try to fix them (I was not really a perfectionist about this part!) At the moment I kind of feel like they're things you only notice if you're looking for them. But maybe I'm just not terribly observant.

Then we did some bed switching and Ari had his new, huge bed with headboard! I'm a little concerned about the scale of it with the relatively small furniture (and relatively small room!) but I think it's going to work out okay. It will have to, really, because it's done now! Well. We could always take one plank off the top to make the headboard itself a little less imposing.

I've had my eye on the Ikea duvet cover for awhile now. As soon as I spotted it last time we were there I thought it'd be perfect in here. And at $29.99 for the duvet cover and 2 pillowcases, the price worked, too. We already had the comforter to go inside of it. I picked up a few more pillows at Ikea and gave Ari one of the gray throws (also from Ikea) we had in our room (you might recognize it from Abe's monthly photo shoots).


We still need a bed skirt, as you can see.

Getting close in here! We need to hang things on the walls, and we have one more big DIY project that I'm hoping to work on this week and finish over the weekend. And some fun accessories, but I'll probably just pick those up as I come across them (I need to start getting out to garage sales on Saturdays!)

Linking with:
Stone Gable's Tutorials, Tips, and Tidbits
Hookin' Up with House of Hepworth
Craftionary's Friday Link Party
The Inspiration Gallery
Miss Mustard Seed's Furniture Feature Friday
The Shabby Nest's Frugal Friday
Tatertots and Jello's Weekend Wrap Up Party
I Heart Naptime's Sundae Scoop Party
Monday Funday
By Stephanie Lynn's Sunday Showcase Party
TwelveOEight's Pretty Things Party
Tutorials and Tips at Home Stories A to Z