


When we first started planning Ari's room makeover, I mentioned that we were contemplating either a pallet wall or headboard. I guess the picture above is kind of a spoiler...we went with headboard. I also did enough reading about the potential chemical laden scariness of pallets to decide to play it safe and buy brand new wood instead, seeing as how it was going to be right next to Ari's developing brain and all.
This is what Ari's bed looked like before:

Basic wooden headboard, twin sized bed, sqeaky bedframe....
We wanted something more exciting and he wanted a bigger, less squeaky bed. Right next door, we had a rarely used queen bed in the guest room. The deal we wound up striking with Ari was that he could have the queen bed, but he'll need to give up his room and bunk with a brother or two on an air mattress when we have guests (well, until Abe moves into the guest room, Ari's old bed is in there and he can just sleep there).
This was a pretty simple project. We bought three ten foot long 1x8 whitewood planks at Home Depot. Queen mattresses are 60 inches wide, so we just got each board cut in half at the store so that we ended up with just the right amount of wood--no waste! Each board was $12, and we already had everything else we used (sandpaper, stain, and anchor screws), so the total cost of the headboard was $36.
Dave sanded down the planks and stained them with Minwax dark walnut:

We let them dry and air out for a couple of days.
Then there was the measuring:
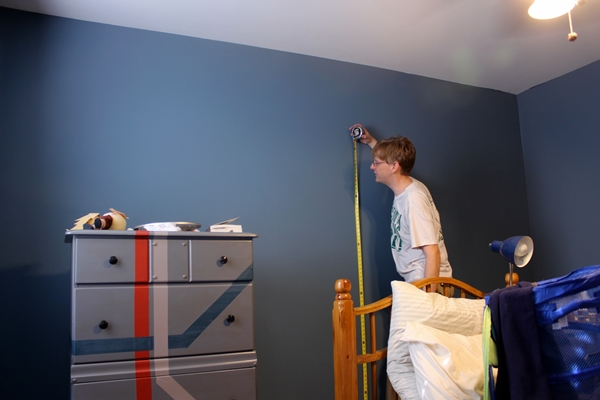
Also, look what happened to Ari's dresser! Boo! We have to fix it:

We made sure the first board starts well below the mattress so that you can't see it. Dave experimented with having kids hold the first board level, but it kept slipping, so he built a makeshift plank holder instead:

We used anchor screws to hold it up. This might have been overkill, as the wood is very light, but, again....developing brain!

We considered various possibilities for filling in those screw holes and covering up the screws, but Dave doesn't think the little caps you can buy and sand down will work, and, in our experience, wood putty won't stain to the same color as the wood, and I was afraid it would stick out more with wood putty than with exposed screws. So we're leaving it as is for now. If it bothers us too much, we'll figure something out later.
The other problems we ran into were some gaps in between the planks (one very noticeable one, but not so noticeable once pillows are in front of it) and warped boards not laying flat against the wall. Again, we'll see how much these things bother us before we decide whether or not to try to fix them (I was not really a perfectionist about this part!) At the moment I kind of feel like they're things you only notice if you're looking for them. But maybe I'm just not terribly observant.
Then we did some bed switching and Ari had his new, huge bed with headboard! I'm a little concerned about the scale of it with the relatively small furniture (and relatively small room!) but I think it's going to work out okay. It will have to, really, because it's done now! Well. We could always take one plank off the top to make the headboard itself a little less imposing.
I've had my eye on the Ikea duvet cover for awhile now. As soon as I spotted it last time we were there I thought it'd be perfect in here. And at $29.99 for the duvet cover and 2 pillowcases, the price worked, too. We already had the comforter to go inside of it. I picked up a few more pillows at Ikea and gave Ari one of the gray throws (also from Ikea) we had in our room (you might recognize it from Abe's monthly photo shoots).


We still need a bed skirt, as you can see.
Getting close in here! We need to hang things on the walls, and we have one more big DIY project that I'm hoping to work on this week and finish over the weekend. And some fun accessories, but I'll probably just pick those up as I come across them (I need to start getting out to garage sales on Saturdays!)
Linking with:
Stone Gable's Tutorials, Tips, and Tidbits
Hookin' Up with House of Hepworth
Craftionary's Friday Link Party
The Inspiration Gallery
Miss Mustard Seed's Furniture Feature Friday
The Shabby Nest's Frugal Friday
Tatertots and Jello's Weekend Wrap Up Party
I Heart Naptime's Sundae Scoop Party
Monday Funday
By Stephanie Lynn's Sunday Showcase Party
TwelveOEight's Pretty Things Party
Tutorials and Tips at Home Stories A to Z
the bedding looks perfect with the subway map dresser! And I don't think the headboard is too big at all, it looks stylishly oversize. :)
ReplyDeleteMy name is Stephanie F, and I endorse that headboard.
LOL--good enough for me!
DeleteThat looks awesome! I think you're being too much of a perfectionist- you would have had way more flaws if you had done a pallet wall, so just embrace the flaws. That's the joy of wood!
ReplyDeleteThat's a very good point; I hate to think how frustrated we (and by "we" I mean "Dave") would have gotten had we tried to deal with a whole wall of uneven boards.
DeleteI love the bedding and the headboard is really cool too! NICE!
ReplyDeleteThanks!
DeleteThat looks really cool! Great job!
ReplyDeleteThanks, Di Linh!
DeleteI love this! I'm planning on making a headboard for our room sometime in the next few months and I love seeing all the great DIY ideas. New follower. :)
ReplyDeleteThanks for stopping by my blog!
Rebekah
Thanks, Rebekah--and welcome :)
DeleteWOW that looks fantastic. Such big bang for your buck and I actually LOVE the scale. My suggestion for a quick fix to the screws: Black or brown sharpie.
ReplyDeleteThat room is really looking fantastic. I am enjoying the process :)
sharpie! brilliant! thanks :)
DeleteThat's a fantastic idea for a headboard! I could even imagine to cover more of a wall behind a bed (mostly because such headboards aren't really common here where I am…)!
ReplyDeleteAnd I would like if the screw holes would just stay as they are, it gives the headboard a rustic charm :)
Love, Midsommarflicka
Rustic charm...I like it! :)
DeleteAmazing! I love it! I want it! I really love the scale of it and I think the warped boards add some character to it. If you were to have done a pallet wall, there's no way those boards would have been straight so it's almost like you're getting the pallet wood's character without all of the icky chemicals! Win-win :)
ReplyDeleteYeah, someone else pointed out how much worse pallet wood would've been, too...totally true, and I didn't even think of that!
DeleteThis is awesome! So super cool and rustic...I love it! I want something like this for my little mans room but wasn't sure how to go about it. Thanks for the inspiration and tutorial!
ReplyDeletethanks, nicole! We spent a remarkably long time thinking about how to do it....for something that ended up being basically, "screw some boards to the wall" :)
DeleteIt looks great! I love the wood, it's so simple yet gorgeous.
ReplyDeleteThanks, Deidre!
DeleteIt looks GREAT! What happened to the dresser? I'd love to hear how you guys fix it. His room is really coming together nicely.
ReplyDeleteSarah
I don't KNOW what happened! he just noticed one day that that chip was broken off. I think our exciting fixing it method is going to be....wood glue. and hoping it's not too, too noticeable.
DeleteHah! Super exciting method. Although, in your defense, probably the best method.
DeleteGretchen this is STUNNING! I love it. You did SUCH A GREAT JOB! It looks perfect for his room.
ReplyDeleteThanks, Kenz!
DeleteAwesome headboard! I like the color you stained it..perfect!
ReplyDeleteSelene @ Restoration Beauty
Thank you!
DeleteThat is gorgeous! Also, kinda crazy about how that bedding looks with the subway dresser!
ReplyDeleteIkea always comes through for us!
DeleteThis is pretty awesome!! You made your own headboard. Great idea and great work, too! Would love to have you share this DIY project at What to do Weekends Party also. Following on Facebook and Pinterest. Linda
ReplyDeletehttp://www.craftsalamode.com/2013/04/what-to-do-weekends-17.html
Thanks, Linda!
Deletewow did that dress it up! LOVE
ReplyDeleteThanks!
DeleteThis looks awesome! I love how it turned out. The room is looking great.
ReplyDeleteThanks, Taryn!
DeleteWOW! this is stunning. If you get a chance, please share this on my linky party: http://suburbsmama.blogspot.com/2013/04/sunday-link-party-5.html
ReplyDeleteThat is pretty AWESOME!! My son would love this. Thanks for sharing it with us AT MONDAY FUNDAY! ;)
ReplyDeleteThanks Bonnie--and thanks for hosting :)
DeleteFor a bedskirt you could do the staple a king flat sheet to the box spring trick.
ReplyDeleteooh. that sounds easier (and probably cheaper) than my solution....I bought fabric for making a no sew thing....like the one on my crib, only on three sides instead of one. Where were you a few days ago?!
DeleteThis is gorgeous. I've been trying to think what to do for a headboard at our cottage, but we can't have one that sticks out too far from the wall due to lack of space and this would work beautifully. My husband is going to be so excited that I've found him another project to do - not!!
ReplyDeleteha! Well, if he has to do a project, this is a pretty easy one at least :)
DeleteI love the room's colors, the bedding, and the scale is just fine, but IMHO I recommend removing the top TWO boards from the head board. The scale just strikes me as not right at the moment.
ReplyDeleteThanks so much for your comment, Jan :)....I do still think about taking a board or two off...I think we need to live with it a bit first (and finish the rest of the room) before we decide for sure.
DeleteYou have been featured at Craftionary. :)
ReplyDeleteVisiting from Monday Funday. I'd like to invite you to my Friday Flash Blog, where you can share your best blog entry of the week! The party goes on ALL weekend at thejennyevolution.com. And who knows, you may just get featured next week.
ReplyDeleteJennifer
thejennyevolution.com
Looks amazing! Great tutorial too. Looking forward to doing this in our house.
ReplyDelete