Showing posts with label dining room. Show all posts

Friday, June 21, 2013

Painting the Sunroom

The sharper eyed among you might have noticed in Wednesday's pinwheel post that the yellow is finally gone in the sun room! But you can't really tell what color it is in that picture, because it's so, so light. It's the lightest I've ever painted a room, ever. Some people are afraid of color; I'm afraid of white walls. And these walls aren't white! But they're closer than I've ever come before.

Dave was startled when I pointed to the color on the card. "THIS one?! Are you sure? It's almost white." But, I mean, it's a sunroom, right? I wanted something cool and light and airy, with the idea that most of the color in the room would come from accessories and whatnot (eventually. We have very few of said accessories and whatnot at the moment).

We started out, as you'll recall, here:


This is before we bought the house. Same yellow paint as everywhere else in the house and a giant leak above the door on the far end there.

We had the leak repaired (and the skylights--suspected source of leak--removed and drywalled over) before we moved in. And then we put a dog crate in it and left it that way for a year:


In the past few months we've made some progress in here. We refinished that big ol' dresser that's up against the windows in that picture. And we moved the dog crate out and some real furniture in so that we could hang out in here.

The next order of business was to finally get rid of both the yellow and all that bare drywall from the leak repair.

My paint selection method was pretty simple: I took the card from the paint I used on the big dresser (or, as Dave would say, credenza), (which was Benjamin Moore's Florida Keys Blue) and picked the lightest color. Which, it so happens, was called Blue Bonnet. This led me to expect it to be more, well.....blue than it turned out to be. It's a really light blue green, but, if pressed, I'd call it green rather than blue. But, then, the Florida Keys Blue dresser is the same way. Most of the time, I'd call it blue, but in certain lights it's definitely green. I'm going with aqua, because that's what I had in my head that I wanted.

This room took forever to paint. It is very big. And we had to paint the ceiling, which is also very big. And three of the four walls are mostly windows, which meant less surface to cover with paint, but also lots and lots of painstaking brush work.

We did primer first, which is not our usual way. But it was clear from the test patch I put on the wall that it was going to take at least 2 coats otherwise, and primer is cheaper than paint. Plus the internet tells me that my paint job will look way more professional with the help of primer, and if the internet says it it must be true.

Two days later, we had this!


It's so light you're not really sure what color we painted it, right? Yes. It's a big, minty box.

You can see the color a little better from this angle, I think:


Here's a beginning stab at colorful accessories and whatnot. That little thrift store lamp (I recognize the shade from Target, but I got it at the thrift store) is the only source of light in the room, still, but we have a plan that might actually work for fixing the fan light. Saving that for another post.


With the dropcloth curtains down (they need to be hemmed and cut into panels before they go back up), you can see what rough shape some of the window are in. I'm scared to hear how much it will cost to replace them.

And, because I don't want to do a whole post about it, I got unlazy enough to move the pinwheels into the dining room and throw together some 4th of July-ish stuff on the buffet in there. I kept bringing in more and more books, so I'm pretending an American literature theme was my plan all along. Mark Twain is heavily featured. I want to switch out the flowers for president cards, but....uhh, well, I haven't yet.


Tuesday, February 12, 2013

Skipping Ahead to Spring


It was in the 60's here Saturday while the northern half of the country was being buried under snow, so I decided to give up on coming up with a late winter theme for the banner in the dining room and just go ahead and accept the early arrival of spring (thus guaranteeing 6 inches of snow sometime in the next few weeks).

Before Christmas, you'll recall, the dining room looked like this:


And then on Saturday, a third of the way into February, it, uhh....still looked like that.

I thought about doing a quick and easy Valentine's banner....I mean, a few hearts cut out of scrapbook paper or something....easy, right? But then I didn't do it. And I thought about presidents for presidents' day, but I never got around to tracking down fun printable president heads either. THEN I thought: chicken breeds! For spring! I love chickens! ....but I couldn't find the right sort of printable chicken drawings, either.

So how about flowers? Flowers show up in spring, and they are nice. We just won't mention to flowers that they were my fourth choice.

I turned again to Botanicus.org, where I found the plant art for Milo and Gus' room and the birds for the master bedroom. I browsed around there for a bit and found Favourite Flowers of Garden and Greenhouse, with many lovely color illustrations.

I downloaded the file, picked out my fifteen favorites, and used up the rest of the ink in my printer printing them out. Printing them out was frustrating, since, unlike with the birds, I didn't want them to print on a full sheet of paper. I tried various methods of getting them to print two per page, but it just wasn't happening (or at least, it wasn't happening in any way that wouldn't take a hundred hours). In the end, I just flipped the page to landscape and printed one per page. This gave me the size I wanted, but it used up twice as much cardstock as I wanted. Oh well.

Anyway, the advent calendar is finally gone, and I don't need to change out the flowers until fall unless I get inspired (Revolutionary War clip art for the 4th of July!). Now I just need to do something about that Thanksgiving/Christmas/Winter centerpiece that's still hanging around.....


Linking with:
Tuesday's Treasures at My Uncommon Slice of Suburbia
TwelveOEight's Pretty Things Party
Tutorials and Tips at Home Stories A to Z
From Dream to Reality at the DIY Dreamer
Tutorials, Tips, and Tidbits at Stone Gable Blog
Hookin' Up With House of Hepworths
Somewhat Simple
The Inspiration Gallery Link Party
Chic on a Shoestring's Flaunt It Friday
The Shabby Nest's Frugal Friday
Countdown to Spring Party at Sand and Sisal
Tatertots and Jello's Weekend Wrap-Up Party
Funky Junk Interior's Saturday Nite Special
Six Days of Spring Link Party
Eclectically Vintage

Monday, December 3, 2012

Belated Advent Calendar

THIS is the project my broken (well, broken until yesterday; still somewhat unreliable and testy) printer delayed and nearly ruined Christmas by refusing to print for me. My poor kids didn't even have an Advent calendar until December 2! Tragic!

And, of course, if you're reading this in 2012, you either already have an Advent calendar or you're pretty much too late to make one. But I'm posting about it anyway.

I'm getting a lot of mileage out of the string of twine and clothespins in my dining room. First there were the anatomy cards for Halloween. Then the banner I made for Thanksgiving. And now I'm recycling it again for the Advent calendar. I don't know what I'll do next. I thought about presidents for  Presidents' Day, but 1. There have been a lot of presidents. I don't know if there's room. and 2. I think the more modern presidents might look....not vintage-y enough for my tastes and for my dining room's vibe. Maybe just OLD presidents. At any rate, it's fun having something that's incredibly easy to change out seasonally.

I don't think I've ever made an Advent calendar for the kids before. We've done online ones, and cheap chocolate filled Trader Joe's ones, and expensive Playmobil ones....but no handmade ones. This one was very simple, with the exception of the 859 hours spent trying to get the printer to work.

First, I found a bunch of vintage Christmasy images I liked from The Graphics Fairy. Then I made a file of them all, two per page, on Open Office. I managed to get the hang of this a little better this time than with the anatomy cards; I figured out how to put an invisible border around the whole thing, so they were nice and centered. I used my usual Boxy Colonial font, "Colonial Dame" and stuck a number on each one.

Then, 400 years later, I managed to print them all out (on the same brown cardstock I used for the Thanksgiving cards. I spent a long time going back and forth between that and antiquing the white again, but that's what I ultimately settled on). Here's a link to the PDF, in case anyone is interested.

I thought about trying to do fancy, or at least curved, edges again, but I finally just kind of chopped them down the middle and then trimmed the other side to make them (more or less) even. Christmas seems like a more....rectangular holiday than Halloween or Thanksgiving, somehow.

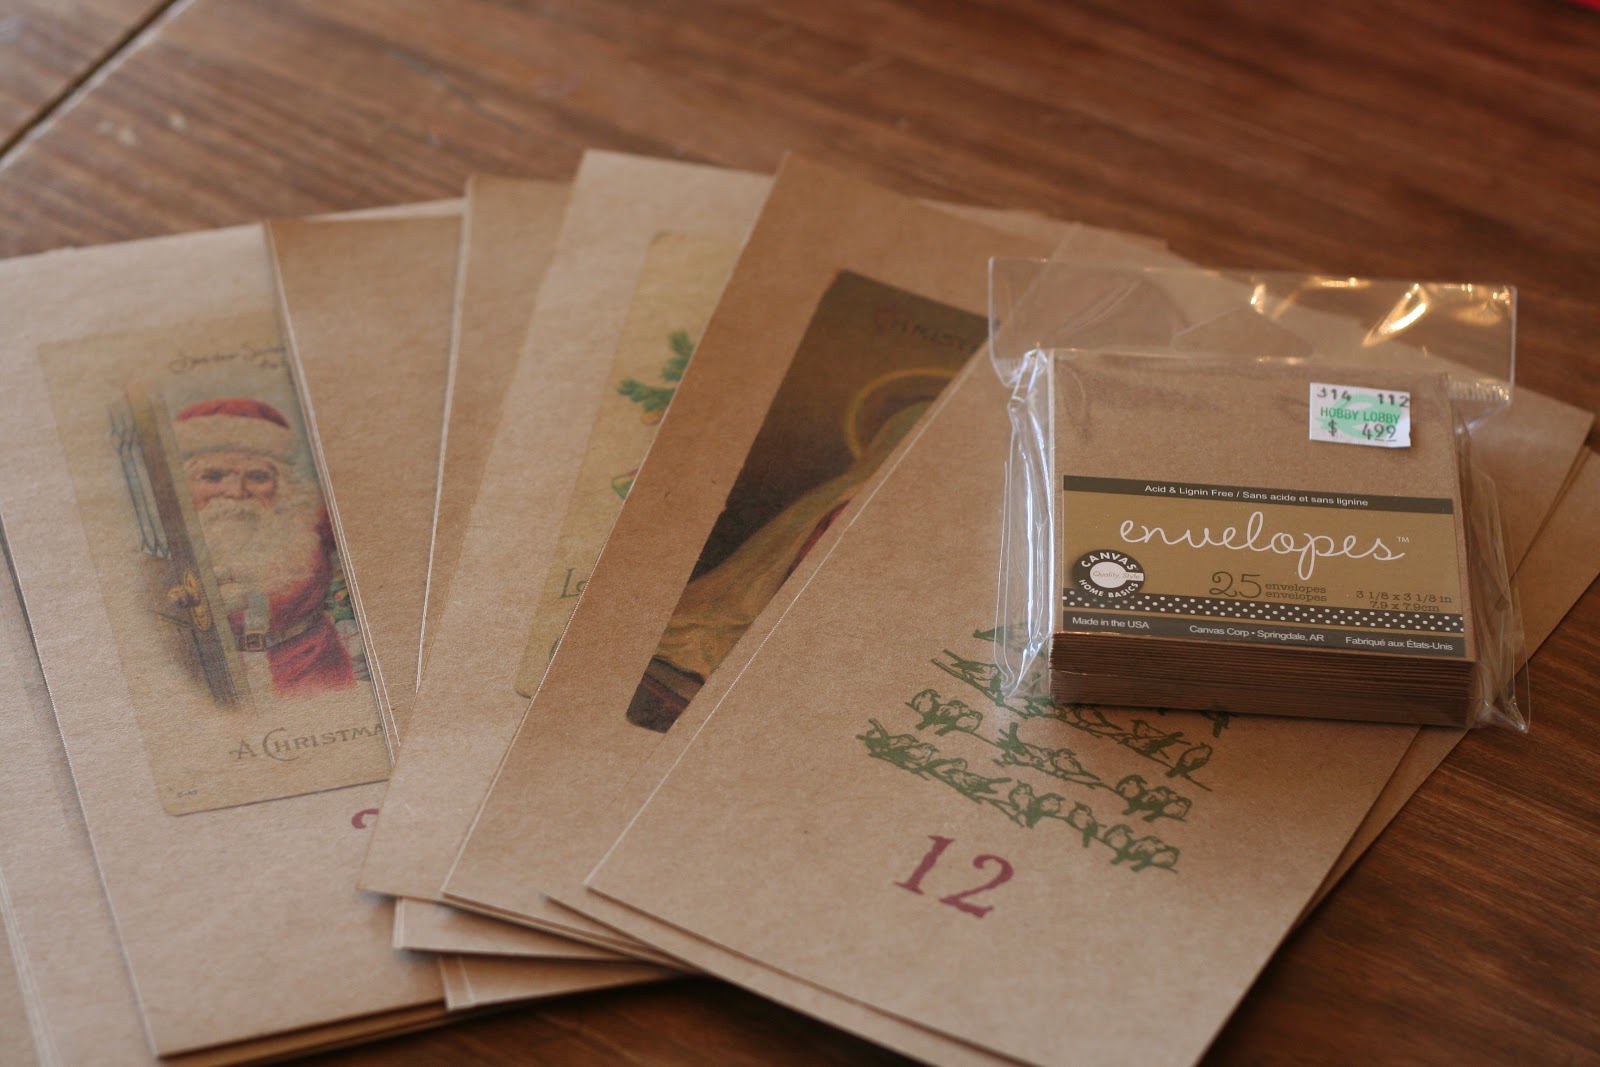
I bought a little package of envelopes at Hobby Lobby when I was on my coaster material run, and then I just glued a little envelopes onto the backs of the cards. Then I put an activity for each day of the month in each envelope, on a little slip of paper. I can't post the list since Ari reads the blog, but the first two were "drink hot cocoa" and "get a Christmas tree." Coming up with 24 ideas without getting in over my head ambition-wise (crafts every day! or: drive to Atlanta for expensive Christmas event twice a week!) was tricky, probably particularly since my kids are older and more jaded. But I did my best. And judging by how excited they were by "drink hot cocoa," I worried more than I needed to.

NOTE: If you are one of my children, don't look at the pictures! Spoiler alert! Minor spoiler, but still: spoiler!


Oh--VERY minor spoiler, since two of these are things they've already opened. Still, Ari: if you're reading, don't tell your brothers.


Have I mentioned my big plans to get a wide angle lens for my birthday in March? Things will be better then.


"Cocoa?! No way! We can't believe our luck!" I had kind of meant at bedtime, but they wanted to go make it right away, and who was I to say no to kids who didn't get a first day of December on their Advent calendar?

Shared with: My Uncommon Slice of Suburbia
Chic on a Shoestring's Flaunt It Friday

Sunday, November 18, 2012

Thanksgiving: Part 2

AKA The Prettiest Table In the World In My House

I DID buy the Patch dessert plates from Target. Then I waited and waited and waited for like FOUR DAYS for them to get here. And then they did! And it was a magical day.

There was a time, back like...a week and a half ago, when I planned to just rearrange some stuff from my fall/Halloween centerpieces to make a....late fall table for Thanksgiving. And then I even did it:


Wah--it's not NEW enough. And it doesn't go with Patch dessert plates. That was the main thing.

So I ordered my Patch plates and made a few shopping expeditions to various places, and this is what I have now (well, not RIGHT now. I put everything away after I took pictures. I'm a little paranoid about a cat coming along and destroying the most beautiful table I've ever seen personally designed):


In addition to the Patch plates, we have plain white plates from TJ Maxx (I think it was $9.99 for each set of 4; I bought 3 sets), gold chargers from Hobby Lobby ($1.99 each), a white with gold tablecloth from TJ Maxx ($19.99), and black napkins from Target ($9ish for 12).


Glass hurricanes and all the candles are from TJ Maxx. Pine cones from our yard. Brass tray and Christmas ornaments from the thrift store (except the little gold balls, from Target). Owl salt and pepper shakers and the black candlesticks are the only things that wound up getting recycled from the Halloween display. Oh, and black river rocks from Target in that one glass container.


I also have a black and gold runner coming from Amazon....although I might have gone without it had I finished the rest of the table before I ordered it. I still want to get some white serving dishes from the thrift store before Thanksgiving, but I'm not having much luck with that so far.

Also!


I only had eight chairs for the dining room table, and I had ten place settings (nine people for Thanksgiving, but who wants an odd number of place settings? Unacceptable!) We were going to go with the ol' pull a kitchen chair in trick, but after I made my pretty table, I wasn't thrilled with this. But then! At the thrift store just last night! As if by magic! There were TWO windsor chairs hanging out, waiting for me! They do not match, but, then, neither do the chairs I already have (4 of one kind, 4 of another). And they need to be painted black, and it's going to be a tight fit finding time for that between now and Thursday. But one of them was $3.03 and the other was $4.04, so I couldn't very well pass them up. Meant to be.

I also did some tinkering with the buffet. The lamps just weren't working for me anymore. Not because I agree with the masses about the color being all wrong ;), but just because things looked...funny with my globes and the lamps trying to co-exist. And I don't really NEED lamps there, since the chandelier gives plenty of light. So away they went. And we finally got the picture hung up. And I found some globe bookends on the very same chair revealing thrifting expedition. And now we have this:


UndertheTableandDreaming


My Uncommon Slice of Suburbia

The Shabby Nest

Chic on a Shoestring's Flaunt it Friday

Dare to DIY (Entertain) Link Party: Decor and the DogNewly WoodwardsMaybe MatildaTwo Twenty One

Thanksgiving: Part 1

The relatives start arriving tomorrow evening, so a lot of what's going on around here is frantic cleaning (clean refrigerator! vacuumed under the couch cushions!)....but there have been interludes for slightly more fun stuff, too (more fun than vacuuming under the couch cushions?! Yes, even more fun than that).

I finally got around to taking down the Halloween-y anatomy flash cards (not that anatomy isn't cool year round) so that I could, just in the nick of time, make a new Thanksgiving set of cards. I'm kind of getting away from the flash card idea and replacing it with more "seasonally themed images on cardstock." I had a thought at one point of doing flashcards of different breeds of turkey, but, well....then I didn't. Maybe I'll do chicken breeds for spring.

Then I thought maybe I'd do a variety of different vintage Thanksgiving images from The Graphics Fairy. But then I decided I wanted some kind of holiday greeting thing in there somewhere, so here, ultimately, is what I wound up with:


There is no angle in this room from which I can get a picture of the whole thing at once. Makes me a little crazy. Anyway.

I started with these free printable "give thanks" letters from At Second Street, and then I added in a few of the vintage images I'd saved from Graphics Fairy: there's a vintage turkey on each end and some oak leaves and acorns in between the two words. I picked up some brown cardstock at Hobby Lobby (I keep talking about Hobby Lobby. I had actually never been there before yesterday. And now I think it's safest for my dwindling supply of money if I stay away. Because OMG: they have everything there! And both the cardstock and the little knob I bought were half off! Of course, the sign by the knobs said, "50% off every day!" ....which I think it's not really a sale anymore if it happens every day. But whatever; it was cheap!).

Oh, I got distracted. Where was I? Yes--brown cardstock. Uhh...then I printed it all out. On the brown cardstock. And look how neatly I cut around the letters! I was kinda proud. I'm like a very advanced kindergartner with my mad cutting skills.

Note: Sad Pilgrims are hanging on the wall now! No more leaning for them. I expect smiles from them any day now. Cheer up--you survived until the harvest! I'm feeling a little loopy tonight. You know where I got the wire to fix the hanger on the back? That's right--Hobby Lobby.

Linking with Dare to DIY (Be Thankful) Link Party: Decor and the DogMaybe MatildaNewly WoodwardsTwo Twenty One
My Uncommon Slice of Suburbia

Friday, November 2, 2012

So easy! So much better now!

Remember these prints, a housewarming present from friends?


I gave them a makeover (i.e. I spray painted the frames), and now they look like this:


I can't believe how different they look now, and how much fresher and better for the space. This is actually the first time I've ever painted frames. Now that I know how satisfying it is, I'll do it every day!

This also really made me see how much I love some gray with the Nantucket Fog....the color itself is so much less gray and more blue than I was originally thinking I'd wind up with, but with its gray undertones, putting some really gray up against it really makes me happy.

Next stop: some curtains for those windows!

Wednesday, October 17, 2012

Wherein I take craftiness to new (for me) levels

Remember when I posted about my anatomy flashcards last week and said that they were kind of a rough draft? I knew I wanted them to look more vintage-y (or, for this set, since they're supposed to be Halloweeny, more old and spooky). I thought this would probably mean buying some sort of specialized card stock, so yesterday I googled stuff like "vintage look cardstock." I found some expensive things that looked...sort of like what I wanted. But my googling turned up something even more interesting:

Did you know that crafty people use their crafty powers to make things look old all by themselves?! I think those crafty people might be on to something after all! And even though I don't have a craft room or even a craft closet (or even a craft drawer), I already had everything I needed to accomplish the old and spooky look for myself.

Here is my supply list:

1. a cup of tea
2.small paintbrush

And if I hadn't had a paintbrush, I could have used a rag or a sponge or a paper towel or, like, an old sock.

I used this tutorial from Missparty.net as my guide, but then I just kind of winged it. Looking back through it, I see that I didn't follow instructions very carefully at all, actually. But it still worked how I wanted it to! That's my kind of craft--the unscrewupable kind!

I made a cup of tea with two tea bags (regular old Publix-brand tea) and let it steep for 10 minutes. Then I got out the little brush we keep in the kitchen for kitchen-type brushing needs, laid out all the flashcards on my counter (if I had white laminate or something, I probably would have put something down first as a precaution against staining, but since my counters are granite and sort of tea-colored to start with, I didn't worry about it). Then I brushed them all over with tea. I went back around the edges with another coat (and this is where I wish I'd taken a little more time, since you can see the edge of the darker stain on some of them....I wish I'd made it look a little more organic, but oh well).


Then I let them dry until it was time to go to bed and I couldn't wait any more, and I hung them back up. 


Much happier with them now. I still want to work on the original document and get them more centered, and then make a template for cutting them out so they're more regular in size, but I'm happy enough with these that I can wait on the next set to worry about that.

Here, for comparison purposes, is how they looked before:


Linked with:
HookingupwithHoH

Chic on a Shoestring's Flaunt it Friday

Wednesday, October 10, 2012

DIY flashcards

Last week I posted a link to some free printable alphabet flashcards that I was thinking of using in my dining room. While my natural tendency IS sometimes to decorate as if I were a five year old, I decided these were probably a bit too juvenile for my dining room purposes (heck, I don't even HAVE a five year old right now, my youngest being nearly SEVEN). I thought black and white instead of so much color might be a little more grown up (and also a lot cheaper to print, since I could use the laser printer instead of the ink jet).

I also liked the idea of designing them myself and making several different sets that could be switched out from time to time. I made two sets last weekend: an animal alphabet set and a human anatomy set (for Halloween!).

(I feel a little ridiculous posting anything resembling a tutorial, since I assume anything vaguely crafty that I can manage to figure out, everyone else can, too, but....) Here's what I did:

1. Found free images to download and use. My main source for the alphabet set was The Graphics Fairy, and my source for the anatomy set (and a few of the images for the alphabet) was Clip Art Etc. I wanted vintage-y looking black and white line drawings in both cases. The Clip Art Etc site has nothing but that, as far as I can tell, and lots of it. Graphics Fairy is more diverse, with a great selection of color images, too and wider ranging subject matter, but if you're looking for a line drawing of a quahog for your Q card, Clip Art Etc. is your place.

So like this:


And this:


2. Downloaded a font to use from Fonts 101. I picked Colonial Dame because, you know, Boxy Colonial and all, and also because I thought it had a nice old-time schoolhouse vibe to it:


3. Went into Open Office and made the flashcards. I'm actually still playing around with the format, because they ended up printing kind of off center and that made cutting them out challenging. But I did a landscape page with two columns, centered and sized the images, and then added the text. I'd also like to find a way to have them print with guidelines for curved corners and a regular size when they print, so I can just cut along those.

4. Went to Target and found the cardstock selection woefully inadequate for my needs. They had either plain white or packs with, like, 5 sheets each of a gazillion different colors. What I really wanted was some kind of light brown color, maybe with a little texture to it. But I got white instead. I'm going to find the kind I want elsewhere and reprint I think (or at least do the next set on the different paper), but I didn't have the patience to wait.

5. Printed and cut! Cutting was more complicated than I wanted it to be, owing to the aforementioned formatting issues. Consider this flashcard set as something of a rough draft.

6. Strung twine across a wall of the dining room and hung up the flashcards with clothespins:


Linking with:
My Uncommon Slice of Suburbia