Showing posts with label diy. Show all posts

Monday, September 16, 2013

Blogger Fall Project Extravaganza: DIY Planter Boxes + a Giveaway with Coupons.com

Coupons.com provided us with a Home Depot gift card to pay for the materials we used for this project. 


I was very excited when I got the chance to participate in this fall project collaboration, in large part because it came with a deadline, and me and deadlines get along very well. Me and "finish it whenever you get a chance, self: I know how busy you are!" are good friends, too, but not as productive friends. We're the kind of friends who sit around and watch TV all night and drink more wine than we meant to.

So Coupons.com was kind enough to send a  few of us bloggers gift cards to Home Depot or Amazon to use to complete a fall project. Did you know that you can use Coupons.com to search for all kinds of discounts to a gazillion different stores, not just for grocery coupons? I'd had no idea, although I'd been using it and loving it for years for printing out grocery coupons. But, yeah, it's all right there! Printable grocery coupons AND coupon codes and discounts for places like....well, like Home Depot and Amazon. And thousands of other places (not really a gazillion. That's not a real number).

My first vision of this post was a wee bit more ambitious than what you see before you. It involved a very elaborate entire front porch makeover, complete with a painted door and a house number plaque and maybe a DIY door mat of some sort for good measure.

Then we realized that thinking we'd be able to get all that done was completely nuts, and we made these planter boxes and called it a day. Really, we're still planning on all the other stuff (and the leftover paint from this project will play into it, but I won't say exactly where, so as to leave some surprises). But time goes by surprisingly quickly, and it's been way too hot and humid to paint a door anyway.

I'm not going to give a detailed tutorial for how we made the planters, because we pretty much followed these plans from Ana White. Only we didn't use the finials, mostly because we couldn't find ones that looked like the ones they used, and we were kind of undecided about whether we wanted them or not anyway, so that decided for us.

These were pretty simple to put together and would be a great first project for someone who just got a Kreg Jig and is looking for something to knock out in a day. That said, we managed to mess them up a little. Dave made a diagram to show how:

 This is how the planter was supposed to look....with the side boards lined up with the inside of the corner posts.
Instead, it wound up more like this. This was not just an aesthetic problem, it meant that the slats for the bottom were too short to fit. So Dave had to hammer in an extra little board for them to rest on:


But then everything was okay.

I even helped with the woodworking part of this a little. Dave was headed out to the store, and I said, "maybe I'll work on these a little!" My little part involved screwing together some already Kreg Jigged boards. Dave showed me how to do it, and, by the time he was ready to leave, it was not going terribly well. "Do you feel like you're getting the hang of it?" he asked.

"No, I wouldn't say that," I said.

"Okay, bye," said Dave.

"What do we do when I completely screw this up?" I asked him.

"We buy more wood," he told me.

"I kind of have a deadline here," I said, "don't you think it's a little irresponsible of you to let me completely mess up my project when I have a deadline?"

But it all worked out, and we didn't even need more wood.

I wanted to do some kind of seasonal fall/Halloween design on these, with the idea that they can then be turned around to the blank side for the rest of the year and be season-neutral. I'm planning on a Edgar Allan Poe/Raven heavy theme for Halloween around here, so ravens seemed like a natural choice.

I considered making a stencil, but I have an irrational fear of stenciling, so I ended up sketching a raven outline and then tracing it onto the boxes. I just googled images of ravens; they're all black, so it's pretty easy to make them outline-y.

Both the paint for the boxes and for the ravens is semi-gloss exterior latex from Behr. I picked a lighter gray for the boxes and then a deep charcoal gray from the same card for the ravens. I did one coat of the light gray, let them dry, then set to work on the ravens.


After I traced around them with pencil, I filled them in with the two coats of the dark gray paint (using little craft brushes). It occurred to me far too late that I probably should have had them facing opposite directions. Oh well.

The next day, when everything was dry, we hauled them out onto the front porch, lined them with cardboard:


Then filled them up (with mulch from our never ending mulch pile and then with a combo of potting soil and compost on top) and stuck some mums (which were on sale, four for $10 at Home Depot) in there. And then they looked like this:


(I was going to show you what they look like turned around and de-Halloween-ified, but turns out they're really heavy once they're full of dirt. I'm not turning them around just for a picture. Take my word for it: no ravens on the other side!)

Now try to picture it with a freshly painted door and shiny new house numbers!

And now for some EXTRA FUN! There are eight other bloggers who are also showing off their fall projects today. I've seen a few sneaky instagram/facebook glimpses of some of them, but for the most part I have no idea what they are, and I'm very excited to see them all. So make sure to hop over to these other blogs and see what everyone else has come up with.

Here we all are, looking very happy about our fall projects:


....and here's where you can find everyone:


But wait! There's MORE! A giveaway, to be specific. Someone's going to win a $200 gift card to (your choice) Home Depot or Amazon. And between those two places, you can find pretty much anything in the whole world.

You can enter below (up to 10 times!) This giveaway is only open to US residents, and it will close at 12 AM on September 23.

a Rafflecopter giveaway

Sharing with:
The Inspiration Gallery

Wednesday, August 21, 2013

DIY Farmhouse Table Tutorial

Dave is here to tell us how he made the farmhouse table. He has a lot to say and show about it. My finger hurts from editing all the pictures. Not even kidding. If you want to make a farmhouse table, you won't find a tutorial more thorough than this one! 


OK.  Dave here for another installment of how to make passably decent stuff out of wood.  I've been planning on making this table for the kitchen since before Thanksgiving.  I finally did it over summer break.  As Gretchen mentioned in the other table post, we spent a long time looking at other plans for tables.  My problem, it seems, is that I keep getting distracted by our hectic lives and/or discouraged about the lack of a particular power tool and/or unable to bookmark the perfect plan when I come across it, so I ended up essentially making this up as I went along.  And, as I mentioned, I came out with a passably decent table.

First off, the dimensions.  Our old kitchen table was too short to put two chairs on the long side comfortably.  With a household of 6, we needed a longer table.  But the eat-in area of the kitchen isn't big enough for a crazy long table.  So after much debate, measuring, and researching, we decided that the perfect length would be 60 inches - long enough for two chairs per long side and short enough so that we can actually fit the chairs at the table without banging into the walls.  Only eight inches longer than the old table, but it was enough.  So here's how I built a 60"x29"x30" farmhouse table.

Shopping List
QtyItemUnit PriceTotal
212' 2x45.3810.76
210' 2x44.448.88
210' 2x87.5715.14
18' 2x85.785.78
2pack of 3/8" dowel plugs1.462.92
150 ct 2 1/2" Kreg screws5.215.21
126 mm furniture glides2.482.48
51.17

Cut List

QtyItemUse
254" 2x4slong apron
225" 2x4sshort apron
222" 2x4ssupports between long aprons
229" 2x8sbread boards
445.5" 2x8stop boards
828.5" 2x4slegs

There's a diagram of the table top from beneath.  Those ovals represent evenly spaced pocket holes attached with a Kreg jig.  As shown, each of the four 45.5" boards have two pocket screws attached to its neighbor.  Given the length and weight of these boards, it might have been safer to use more.  Now that it's attached to the aprons it's fine, but I was worried the screws might get ripped out before I finished.  I also used wood glue to strengthen each seam.


We started out by aligning the four boards in such a way as to minimize the gaps between them.


We glued and screwed the four top boards, then made a nice clean cut on both sides to make the desired 45.5" length.


We then glued


and screwed some more, this time for the bread boards.


Here is a close-up of one of the pocket screws.


This table top is crazy heavy.  This was one of the times when I feared the screws wouldn't hold.  But they did!


Here's a diagram of the long and short aprons.  They are attached with two pocket screws per joint.  I planned to glue the joints, too, but forgot.  Not shown in this diagram are the extra two supports, but you'll see the real thing below.  Again, each joint is held by two screws.  I opted for 2x4s for the apron as I was trying to optimize leg room.  I think an extra two inches of a 2x6 would have made it hard to fit legs (human, not table) under the table.


Behold, the assembled apron.  You can't see them, but there are 16 pocket screws holding it together.

Of all the decisions that went into this construction, the hardest one was how to make the legs.  I thought of using 4x4 posts, but I couldn't find any that were untreated.  While the legs would be coated with polyurethane and would have probably contained the noxious fumes well enough (?), it still made me a little nervous.  Also, the treated lumber would be a different color!  I entertained the thought of simply buying pre-built table legs, but Gretchen thought that that was lame.  Also, I think they were $10 a piece, which would have significantly affected the total cost.  I finally decided on stacking two untreated 2x4s together to make the illusion of a 4x4 post.  It wasn't until I saw it and thought "Huh, that doesn't look square like a 4x4" that I remembered that the length and width of a 2x4 aren't really at a ratio of 2:1.  Not a huge deal, but it's a little bothersome.

Anyway, I didn't want the legs to be nested inside the apron.  The table was already pretty narrow and I didn't want to sacrifice any of the stability by moving the legs toward the center.  It probably would have been fine, but I decided to notch out one of the 2x4s so that the leg would join flush with apron.

Each leg consists of these two boards.  The difference in height of 3.5" matches the height of the 2x4s of the apron.  The width of the notch is (supposed to be) one half the width of the board, or 1.75".  More on that in a bit.


The notches were cut out first by circular saw, then by jig saw.  The less-than-flush cut made by the jigsaw made the seam between the leg and apron ... less-than-flush.  We might cover those up with fancy industrial-looking brackets in the future.

I got to pull out my Father's Day gift of countersinking drill bits here.  Four countersunk 2.5" deck screws per leg, a healthy amount of glue, and the wood plugs and the legs were done.


A post-stain picture.

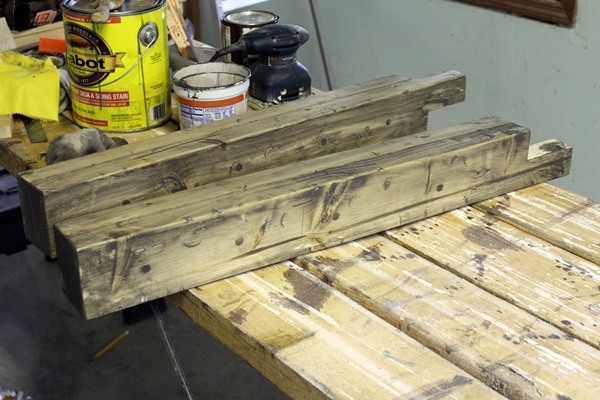
The distressing was pretty fun.  We used both sides of some hammers, the sides of a screw being wacked by a hammer, and this metal right angle frame for drywalling that is for some reason in the basement to get just the right amount of destruction.


Milo and Gus got the idea.


Ari doesn't like loud noises, though.

We thought it'd be easier to sand and stain before assembling the legs, apron frame, and top.  But sanding is so boring.


Unless you're Gus.  Then you get into it.


Since the table was clearly going to be very heavy, I decided to assemble the pieces in the kitchen.  So after Gretchen stained all the parts, I brought them to the kitchen.


There were many right angles to verify.  Once the leg was positioned I used three countersunk 2.5" deck screws to attach each leg to the apron - one screw into the long apron and two into the short, sunk into two sides of the leg notch.


Rotate and repeat.


While it may be hard to see in this picture, this is when I realized an aesthetic problem.


Here's a close up of one of the legs and how I didn't do so well cutting that notch at exactly 1.75".  Close, but no cigar.


Fortunately, the trusty Ridgid multitool could fix my sloppiness.


After much wood shavings and sand paper, all four legs were more flush to the apron than before.


Much better!  Good thing we had leftover stain.

Next, to attach the top.  Careful measuring to make sure the countersunk screws didn't miss the apron ... there was a 2 inch overhang and the narrow side of a 2x4 to hit the middle of.  So 2 inches plus half of 1.5 inches gives you 2.75 inches.


Three countersunk screws evenly spaced on each of the four sides of the table


a few more wood plugs, and a bit more stain and you've got yourself a table.

Slap on the polyurethane, attach some threaded furniture glides to the legs, and sit down to eat!

Update:  The table turned out a bit wobbly, which makes me sad.  I think my notched leg construction was not the best idea.  I thought of adding a diagonal brace inside each apron corner - you know, like real tables - but decided to try reinforcing with a few extra screws going from the legs up into the bottom of the table top.  Here's a few of the underside - two screws per leg.  That has made a significant difference for now.  Hopefully forever.


Linking with:
The Creative Connection
The Shabby Nest's Frugal Friday
Miss Mustard Seed's Furniture Feature Friday
The Inspiration Gallery
Monday Funday

Tuesday, May 21, 2013

It's Just the London Skyline, Ah Sweetheart.....


It's an Indigo Girls reference. Get it? In a bit of poor timing, I had Strange Fire in the disc changer in my car for awhile just before I did this project, and now I can't get that song (or at least that line) out of my head.

I came up with the idea for this project one day while I was in the shower, which is, historically, where I get all my best ideas (I used to compose entire paragraphs of papers there when I was in grad school. Of course, the problem with composing paragraphs in the shower is that you have to memorize them and keep them in your head until you get to a computer). The thought process went something like this: "hmm....maybe a skyline of some sort for Ari's wall? Like the thing from the beginning of Frasier...the outline of Seattle. But not Seattle. Where? Atlanta? Because we live here? Boring. Paris? Eiffel tower? Too hard. ......London? London Eye! Yes! Also with string!"

This was back when we were first starting on Ari's room makeover, and I've spent a lot of time since then fretting that the end result would not match the vision in my head. I dealt with this anxiety by putting it off as long as possible instead of just doing it already and getting it over with. I think it's probably good that we waited until after the big Boston map fail, though. Probably we were due for a screw-up, and I'd rather it were that than this.

And....I'm really happy with it! It looks pretty much like it did in my head! yay! Ari loves it, too. Extra yay!

I'll just go ahead and show it to you instead of making you scroll before I get to the how we made it part. I can't wait anymore, because I'm so excited about it.


The materials for this project were a 2 by 4 foot sheet of plywood (around $11), stain (already on hand), a box of tiny nails ($1.50), and 3 skeins (is that the right word? it's such a fancy word) of embroidery thread ($1.20 for the 3). So a total cost of under $14.

We started with the blank sheet of plywood, a picture of a London skyline stencil that I found online, and my rough sketch:


We needed too big of a circle for any circle shaped things we could find in the house (mixing bowls, pizza pans), so we hammered a nail in the center of the future circle, tied a loop of string the right radius to it, and did this:


That's the inner circle I'm making right there. We debated whether to do the compartments on the edge of the ferris wheel, but decided not to. I mean, people don't actually have to ride in it; it's just a wall hanging. And we figured it would be pretty obvious it was a ferris wheel And also it would have been hard to cut out all the little round shaped things with the jigsaw.

Then I did my thing where I sketch and redo all the lines 400 times trying to get it right. Dave went back and marked the practice lines with Xs so he'd know where to cut:


Then down to the basement to cut it out! Dave drilled a hole to get the circle started:


Then cut it out with the jigsaw. In flip flops! Classy!


Then I stained it. I used Varathane Dark Walnut (they were out of the Minwax when we bought it. I think I like the Minwax better).


If this were a whale, we'd have been all done. But we still had to do the string part.

Dave hammered a gazillion little nails in two rows along either edge of the circle. He wrapped a tape measure around it to get the spacing even:


And then we put the thread on (it's hard to tell, but it's a light gray rather than white). We did a criss cross design along the edge and then all the spokes to the middle. This part was tricky at times; it's a little hard to tie the thread to the nails, for one thing. But mostly the problem was with the thread slipping off the nails. We wound up having to put a second nail in the middle, because we couldn't fit any more thread around the first one (this could have been avoided by using a bigger nail just for that center one).


But we persevered!


We hung it up over Ari's desk. For the big plywood whale in Abe's nursery, we used anchor screws. But this one was MUCH lighter since we'd cut so much wood away (and it wasn't going to be hanging right over Ari's bed), so we went with just regular screws and screwed it directly to the wall (we thought about various other hanging techniques, but since it's not a rectangle at the top, our options were limited).

And here it is some more!


We're almost finished in here! I have one more thing to post individually about, and then a few more little, non-post worthy, things to finish up, and then I'm hoping for the final reveal/tour/source list next week. Here's the to-do list we made before we did the skyline (which is referred to as "secret project" on the list, since I didn't know when I'd post the picture):


Ari added "inspected by Lance." He's an odd boy.

Linking with:
Stone Gable's Tutorials, Tips, and Tidbits
Inspiration Gallery
The Shabby Nest's Frugal Friday
Hookin' Up With House of Hepworths
Tatertots and Jello's Weekend Wrap Up
Classy Clutter's Spotlight Saturday
I Heart Naptime's Sundae Scoop Link Party
Monday Funday
By Stephanie Lynn's Sunday Showcase Party
Tuesday's Treasures at My Uncommon Slice of Suburbia
Home Stories A to Z Tutorials and Tips
Time to Sparkle Link Party