Showing posts with label dave's posts. Show all posts

Wednesday, August 21, 2013

DIY Farmhouse Table Tutorial

Dave is here to tell us how he made the farmhouse table. He has a lot to say and show about it. My finger hurts from editing all the pictures. Not even kidding. If you want to make a farmhouse table, you won't find a tutorial more thorough than this one! 


OK.  Dave here for another installment of how to make passably decent stuff out of wood.  I've been planning on making this table for the kitchen since before Thanksgiving.  I finally did it over summer break.  As Gretchen mentioned in the other table post, we spent a long time looking at other plans for tables.  My problem, it seems, is that I keep getting distracted by our hectic lives and/or discouraged about the lack of a particular power tool and/or unable to bookmark the perfect plan when I come across it, so I ended up essentially making this up as I went along.  And, as I mentioned, I came out with a passably decent table.

First off, the dimensions.  Our old kitchen table was too short to put two chairs on the long side comfortably.  With a household of 6, we needed a longer table.  But the eat-in area of the kitchen isn't big enough for a crazy long table.  So after much debate, measuring, and researching, we decided that the perfect length would be 60 inches - long enough for two chairs per long side and short enough so that we can actually fit the chairs at the table without banging into the walls.  Only eight inches longer than the old table, but it was enough.  So here's how I built a 60"x29"x30" farmhouse table.

Shopping List
QtyItemUnit PriceTotal
212' 2x45.3810.76
210' 2x44.448.88
210' 2x87.5715.14
18' 2x85.785.78
2pack of 3/8" dowel plugs1.462.92
150 ct 2 1/2" Kreg screws5.215.21
126 mm furniture glides2.482.48
51.17

Cut List

QtyItemUse
254" 2x4slong apron
225" 2x4sshort apron
222" 2x4ssupports between long aprons
229" 2x8sbread boards
445.5" 2x8stop boards
828.5" 2x4slegs

There's a diagram of the table top from beneath.  Those ovals represent evenly spaced pocket holes attached with a Kreg jig.  As shown, each of the four 45.5" boards have two pocket screws attached to its neighbor.  Given the length and weight of these boards, it might have been safer to use more.  Now that it's attached to the aprons it's fine, but I was worried the screws might get ripped out before I finished.  I also used wood glue to strengthen each seam.


We started out by aligning the four boards in such a way as to minimize the gaps between them.


We glued and screwed the four top boards, then made a nice clean cut on both sides to make the desired 45.5" length.


We then glued


and screwed some more, this time for the bread boards.


Here is a close-up of one of the pocket screws.


This table top is crazy heavy.  This was one of the times when I feared the screws wouldn't hold.  But they did!


Here's a diagram of the long and short aprons.  They are attached with two pocket screws per joint.  I planned to glue the joints, too, but forgot.  Not shown in this diagram are the extra two supports, but you'll see the real thing below.  Again, each joint is held by two screws.  I opted for 2x4s for the apron as I was trying to optimize leg room.  I think an extra two inches of a 2x6 would have made it hard to fit legs (human, not table) under the table.


Behold, the assembled apron.  You can't see them, but there are 16 pocket screws holding it together.

Of all the decisions that went into this construction, the hardest one was how to make the legs.  I thought of using 4x4 posts, but I couldn't find any that were untreated.  While the legs would be coated with polyurethane and would have probably contained the noxious fumes well enough (?), it still made me a little nervous.  Also, the treated lumber would be a different color!  I entertained the thought of simply buying pre-built table legs, but Gretchen thought that that was lame.  Also, I think they were $10 a piece, which would have significantly affected the total cost.  I finally decided on stacking two untreated 2x4s together to make the illusion of a 4x4 post.  It wasn't until I saw it and thought "Huh, that doesn't look square like a 4x4" that I remembered that the length and width of a 2x4 aren't really at a ratio of 2:1.  Not a huge deal, but it's a little bothersome.

Anyway, I didn't want the legs to be nested inside the apron.  The table was already pretty narrow and I didn't want to sacrifice any of the stability by moving the legs toward the center.  It probably would have been fine, but I decided to notch out one of the 2x4s so that the leg would join flush with apron.

Each leg consists of these two boards.  The difference in height of 3.5" matches the height of the 2x4s of the apron.  The width of the notch is (supposed to be) one half the width of the board, or 1.75".  More on that in a bit.


The notches were cut out first by circular saw, then by jig saw.  The less-than-flush cut made by the jigsaw made the seam between the leg and apron ... less-than-flush.  We might cover those up with fancy industrial-looking brackets in the future.

I got to pull out my Father's Day gift of countersinking drill bits here.  Four countersunk 2.5" deck screws per leg, a healthy amount of glue, and the wood plugs and the legs were done.
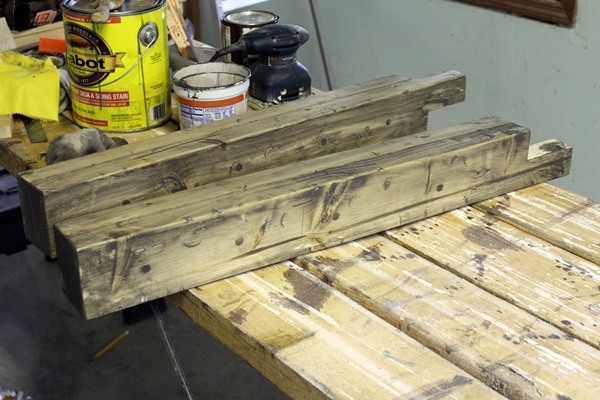


A post-stain picture.

The distressing was pretty fun.  We used both sides of some hammers, the sides of a screw being wacked by a hammer, and this metal right angle frame for drywalling that is for some reason in the basement to get just the right amount of destruction.


Milo and Gus got the idea.


Ari doesn't like loud noises, though.

We thought it'd be easier to sand and stain before assembling the legs, apron frame, and top.  But sanding is so boring.


Unless you're Gus.  Then you get into it.


Since the table was clearly going to be very heavy, I decided to assemble the pieces in the kitchen.  So after Gretchen stained all the parts, I brought them to the kitchen.


There were many right angles to verify.  Once the leg was positioned I used three countersunk 2.5" deck screws to attach each leg to the apron - one screw into the long apron and two into the short, sunk into two sides of the leg notch.


Rotate and repeat.


While it may be hard to see in this picture, this is when I realized an aesthetic problem.


Here's a close up of one of the legs and how I didn't do so well cutting that notch at exactly 1.75".  Close, but no cigar.


Fortunately, the trusty Ridgid multitool could fix my sloppiness.


After much wood shavings and sand paper, all four legs were more flush to the apron than before.


Much better!  Good thing we had leftover stain.

Next, to attach the top.  Careful measuring to make sure the countersunk screws didn't miss the apron ... there was a 2 inch overhang and the narrow side of a 2x4 to hit the middle of.  So 2 inches plus half of 1.5 inches gives you 2.75 inches.


Three countersunk screws evenly spaced on each of the four sides of the table


a few more wood plugs, and a bit more stain and you've got yourself a table.

Slap on the polyurethane, attach some threaded furniture glides to the legs, and sit down to eat!

Update:  The table turned out a bit wobbly, which makes me sad.  I think my notched leg construction was not the best idea.  I thought of adding a diagonal brace inside each apron corner - you know, like real tables - but decided to try reinforcing with a few extra screws going from the legs up into the bottom of the table top.  Here's a few of the underside - two screws per leg.  That has made a significant difference for now.  Hopefully forever.


Linking with:
The Creative Connection
The Shabby Nest's Frugal Friday
Miss Mustard Seed's Furniture Feature Friday
The Inspiration Gallery
Monday Funday

Monday, April 15, 2013

Dave Tells Us How to Build a Bench with Shoe Storage

Dave's on a roll with this whole writing posts thing! I'm pretty sure this post has the distinction of the most pictures of any post EVER! Pictures are helpful when you're trying to build stuff.

This project was pretty fun.  Since we have plans to build a farmhouse table for the kitchen some time (sooner rather than later, hopefully), this was a good warm-up project.  While I've built things out of wood before (fence, stairs, baby gate), this bench was the first piece of furniture I've ever done.  I really wanted this to look nice, even under close inspection, and I think I succeeded from certain specific angles. "We can just make sure that's the back" was something Gretchen told me maybe five times throughout the process.  I finally had to remind her that only one of the sides can be in the back ...

Gretchen got Ana White's book for Christmas: The Handbuilt Home: 34 Simple Stylish and Budget-Friendly Woodworking Projects for Every Room ...and we used the farmhouse bench (project #11) as a guide.  I had to modify the plans a bit to fit our needs, though.  Firstly, the bench in the book is 59.5" wide and the foyer wall is only 53.5" wide.  Secondly, the shelf under the bench in the book is narrower than the bench top.  This allows for a few inches of overhang on either side of the bench legs and room for some creativity in the trim.  Since our bench needed to be wide enough to hold four shoe baskets, I opted to eliminate the overhang, push the legs out to the full length of the bench top, and maximize shelf space.  Finally, I wasn't wild about the curly shape that was cut out at the bottom of the legs, so I changed it to be a simple triangle shape.  Added bonus, straight lines are easier to cut!
After reading through the plans in the book, I came up with the following diagram.  It's pretty rough and on a piece of old envelope (as is most everything else that I write), but it helped me come up with my cut list.  It is, obviously, not drawn to scale.  I didn't have enough envelope to make it long enough.  So before you ask, no, my bench is not 6 feet tall.


Cut List

1x12 pieces:
One 53.5 inch (bench top)
One 52 inch (shelf)
Two 17.25 inch (side legs)

1x3 pieces:
Two 53.5 inch (top trim)

1x2 pieces:
Two 50.5 inch (shelf trim)
Four 15.5 inch (side trim)

This translated into the following shopping list:
Two 6-foot 1x12s
Two 6-foot 1x3s
Three 6-foot 1x2s

Other materials used:
Molding & Trim Nails (size 8D, whatever that means) that are 2" long
Wood glue
Sandpaper

Tools used:
carpenter square
tape measure
circular saw
jigsaw
pocket hole jig (I have a Kreg jig)
clamps (Kreg 2-3/4-in face clamp and Kreg right angle clamp)
power sander
hammer
power drill

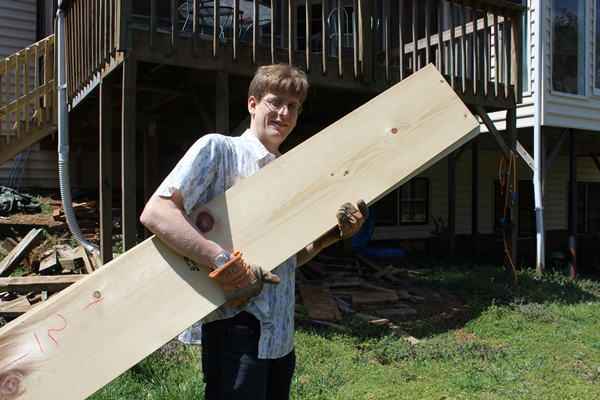
To the workbench!  Ari, my eldest son, was my helper on this project and took most of the pictures.  Here's me carrying the 1x12s to the basement.


You've heard the saying "Measure twice, cut once"?  I'm more of a measure four times, cut once kind of guy.


This project has taught me that it is nigh impossible to cut a straight line with a handheld saw.  A neighbor loaned me his miter saw when I was building the fence and I was really missing it here.  Eventually, I figured out a way to cut nice straight lines with a guide, but this poor bench got maybe two of these guided cuts.  Most of them are a little wobbly upon close inspection.  Learning experience!

(I just googled "cutting a straight line with a circular saw" and found that I'm not the first to discover the trick.  This video explains it pretty well.)

Here I am inspecting a wobbly cut.  I am displeased.


Another job Ari assigned himself during this project was to label each piece of wood I cut.  While it was a little silly, it was not entirely pointless.  I wasn't going to get these few pieces mixed up (only four 1x12 pieces on the first stage), but I can see this being a useful technique with more complicated projects.


After the bench top, shelf, and two legs were cut, I measured and cut the (simplified) design at the bottom of the legs.  The distance from the corner of the wood to the base angles of the triangle are 3/4 inch.  The height of the triangle is 4 inches.  You can see a small mark at the bottom where I measured the midpoint.  I then used the carpenter square to find the apex point of the triangle.


After cutting some wobbly lines with the circular saw, you'll see that the triangle is not detached yet.


If I cut farther, the top of the cut would go into the leg.  Ugly!  Structurally unsound!  This is when the jigsaw comes in handy.  Apparently, Ari was off labeling pieces of wood when I was using the jigsaw, so you'll have to use your imagination.  Incidentally, I learned this technique when building the deck stairs last fall.  This guy talks about it at 7:55 if you want to see it done.

After the 1x12s were cut, we broke out the Kreg jig to get the pocket holes ready for some fine wood joinery.  Joinery is my new favorite word.  I had used my jig once before to build the very simple garden bed a few weeks back, just to get a feel for how it works, so we were ready to tackle the pocket holes on the bench. We made three holes spaced 4 inches apart per joint.  We used 1 1/4 inch screws, as suggested by Ana White.  (I actually tested a pocket hole joint with 1 1/2 inch screws on some scrap 1x4s and, sure enough, the tips of the screws poked out.  1 1/4 inch is the way to go when joining 1 by's at right angles with the Kreg jig.

Now would be a good time to mention that I held off on sanding the cut pieces of wood until the bench was assembled.  I say this now, because sanding at this stage would have been appropriate.  After the wood is joined, there are tough angles to reach with a sander.  So I wouldn't spend a ton of time getting everything super smooth before assembling, but a quick sanding the rougher parts would have made future sanding more efficient.

Unfortunately, Ari did the drilling.  This meant that he was not available for the documenting.  I fell down on the job and we have no pictures of Ari making the pocket holes.  But he did this thing where he mimicked the sound of the power drill while he was drilling.  I appreciate Ari's sense of humor.  Fortunately, if you're really itching to see one of my sons drilling pocket holes, you can see Gus doing so on the garden bed tutorial.

The garden bed didn't require super flush joinery, but as I mentioned, I wanted the bench to hold up to fairly severe scrutiny.  This required some sort of tool to help keep everything in place before the screws were doing that job.  Enter the right angle clamp!


Once two of the screws were in place, the clamp is removed and the final screw is drilled in.


I remembered to take a picture!  We used the weak old battery powered drill that holds a charge for 5 minutes for this part.  (The corded drill is not adjustable and is better suited for making holes.)  The torque was set on a medium low setting to avoid screw stripping.  I didn't remember to glue these joints, but they seem solid without it.  Fine wood joinery!


Ari hasn't seen, but would enjoy, the "I'm crushing your head" skits from Kids in the Hall.


So here's the bench thus far.


It looks like a passable bench, but when you sit on it, the top sags.  So turns out the trim isn't just for looks, it serves a stabilizing purpose.  Back to the circular saw and a few more wobbly cuts.  Before gluing and nailing the trim on, I decided to predrill the nail holes on the trim.  I figured that would make it easier to keep the trim in place when hammering.  I didn't know the best size hole to make, so with some scrap wood and some trial and error, I found a hole size I was comfortable with.


You can see that these nails have practically no head, so it was important to make the hole small enough so that the wood wouldn't just slip off.  The 3/32" hole probably would have worked fine, but I opted for the 7/64" drill bit.

I was careful to mark where the holes would go ... measure four times, drill once.  The nails were going through the trim and into the 3/4 inch side of the 1x12s.  So I used the carpenter square and tape measure to evenly(ish) space 7 nail holes in the top trim pieces, 6 nail holes in the shelf trim pieces, and 2 nail holes in the side trim pieces - each hole being 3/8 inch from the edge of the trim (half of 3/4 inch).


Then to glue and nail the trim on.


(Ari went through a period during this process where he got very concerned about copyright laws and wanted to cover up every single logo with some painter's tape.)  When nailing trim on, it is possible to bend the wood so that the wide surface of the bench top (or shelf or leg) is forced flush with the thin surface of the trim.  Holding that in place when hammering each nail will help with some fine wood joinery.  You may notice the tiny hammer I'm using.  It's the kids'.  I didn't feel like going upstairs to get the man-sized hammer.  I think I preferred the little hammer for this job, actually - it's better for accuracy and I didn't need, or even want, much power.

Once the trim was on, I wanted to neaten up the joints.  In two places, there was significant mis-measuring where the trim went past the bench by 1/8 inch or so.  Fancy pants me decided to pull out the circular saw to trim off the excess.  The first cut was a bit of a disaster, as it ate into the part of the bench I wanted to keep. I was much more careful with the second cut and things worked out better.  I was pretty depressed about that first cut, but was pleased to see how several minutes of power sanding can erase such mistakes.  I didn't get any before shots, but this is what the corrected edge looks like.


Here are a few more close-ups of fine and not so fine wood joinery.


I was extremely pleased with the efficiency of my wood purchasing.  Here is the completed bench with all of the scrap wood.  Of particular note are the itty 1x12 slices on the bottom right.  Apart from the triangles (which can't be counted as waste, I think), this was the only leftover 1x12.


So there you have it!  My first piece of furniture.

He forgot to mention the parts where he sanded it with the power sander and stained it (the color is "weathered gray"). He did all of that, and then it looked like this:


This post contains affiliate links