Showing posts with label Halloween. Show all posts

Friday, September 27, 2013

"The Raven" Halloween Vignette + Fun with Printables


I showed off my Halloween tree the other day, but today I bring you....the rest of the top of the buffet! I've been having fun switching out the stuff on top of the buffet seasonally...it's such a big surface, and I never really knew what to do with it before; having permission to get all theme-y with it makes it easier.

I don't think I ever posted a picture of the whole summer display after I added Brass Hound, so let's revisit that first, shall we?


And now it's like this!


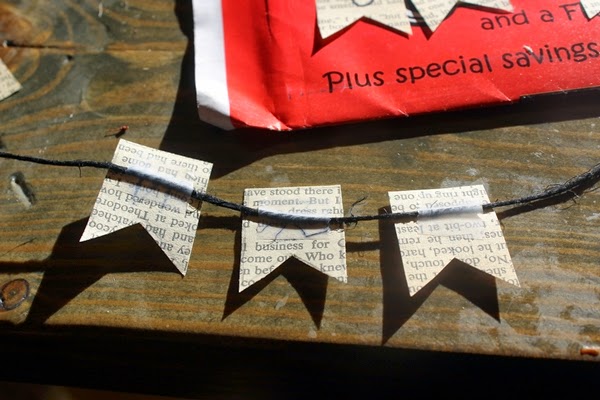
Left to right, we have my halloween tree with tiny banner and the first of several dollar store crows (we're pretending they're ravens, though). Then some candles that I bought and used in last year's Thanksgiving centerpiece.

The spooky books (bookended by Brass Hound) are Jonathan Strange and Mr. Norrell, Frankenstein, and a collection of Sherlock Holmes stories.

And next up we have the fun with printables parts.


(the black lacy thing is from the Dollar Tree, btw).

I've had these "apothecary-inspired" labels from Country Living in mind since Brooklyn Limestone linked to them last Halloween. So I knew I'd be printing some out this year and started looking for some bottles to go with them a little while back. The widest bottle is from some real life whisky that Dave bought at some point in the past. I told him to save the bottle, even though I didn't remember at the time why I wanted it. Go me. Then I found a little Anchor Hocking bottle for a dollar at the thrift store, and that's holding my curare now. Then I ran out of time for thrifting bottles and picked up the last one for $5 at Hobby Lobby.

The instructions on Country Living say to print the labels out on sticker painter, but I decided to try regular paper and spray adhesive instead to save some money. And it worked great!

The "poisons" are apple cider vinegar and water mixed with a little vanilla. I didn't put anything in the big one since I had neglected to save the lid for it. I guess someone already drank all the belladonna.

And then I printed out these two pictures:


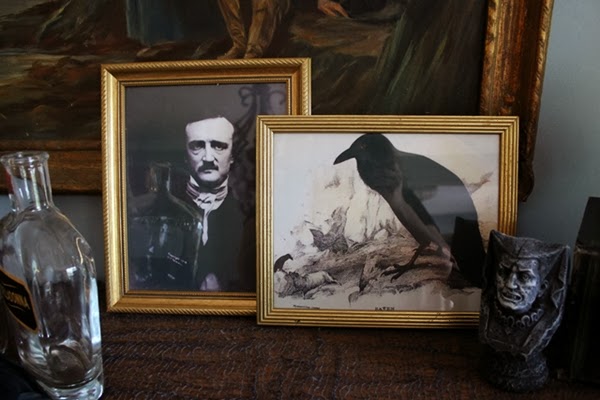
Two gold thrift store frames. For the first one, I just googled images of Edgar Allan Poe and found one that was big enough to look good printed out as an 8 by 10. The raven is from The Biodiversity Heritage Library. They're my go to source for free printables, assuming it's a printable of an animal that I want, which it usually is.

Don't need a raven? Perhaps you could incorporate some spiders into your Halloween decor:


Maybe a terrifying bat?


Etc.

The creepy lady is another Dollar Tree purchase. And then there's an old unabridged dictionary, because nothing says scary like a GIANT BOOK with lots of WORDS in it.

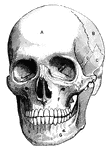
On top of said terrifying dictionary is a Target skull from last year and, uhh, a clock. Because, umm....mortality? Sure. And then a couple more candles for good measure. 

Oh, and in the top picture you can see that my anatomy flash cards from last year are back up, too. 

Okay, so THEN, just when I was writing this post, my friend Kristi stopped by out of nowhere (I mean, she lives right down the street, so it wasn't too startling) and.....gave me an awesome raven! I was all, "where did you get this raven?!" and she said, "the store" and then disappeared into the night. My dogs were barking, and I think her kids were waiting in the car? Anyway. That's all I know. I don't know where to put him yet. Because I just got him. But here he is:


(Bonus! I had to clean part of my kitchen, because I couldn't find a single space to set him for the picture where he wouldn't be surrounded by piles of crap)

Update: Kristi says he's from Ross. Go get one!

Linking with:
Link Party-Palooza
Monday Funday

Monday, September 23, 2013

Halloween Tree with a Tiny Banner


Remember a few weeks ago when I posted about my mini kitchen makeover that included all sorts of blog standards like a chalkboard wall, a farmhouse table, and Revere Pewter walls? Well. I decided to keep it up by doing a craft project involving a banner AND book pages!

And I can totally see why everyone wants to make tiny little banners and things out of book pages, because OMG. This is the most adorable thing I've ever done. In a spooky sort of way, I mean.

Here. I couldn't decide, so I made two pictures with words for this one:


I didn't know which one to lead with, because this is like two projects in one! More for your money: that's what you get here at Boxy Colonial.

Anyway. As evidenced by the raven-embellished planter boxes we made last week, we're gearing up for an Edgar Allan Poe inspired Halloween around these parts. Well, mostly just The Raven. Next year we're getting all Tell Tale Heart and ripping up floor boards! Not really.

I have a whole Halloween display on my buffet with a couple of other crafty-ish projects to show you later this week, but today you only get to see my Halloween tree. It will take me long enough to talk about that part. BELIEVE me.

I found this tree made out of twisted black metal at the thrift store a few weeks ago. Judging from that price tag, I paid $3.03 for it:


Then it sat around for awhile and I tried to decide what to do with it. It has these round things on it that I assume are supposed to hold candles. But I didn't put candles on it.

Then I spotted these mini purple lights at Target the other day:


$3.50, so we're up to $6.53 invested in this thing. I'll just go ahead and say, so that I don't forget later, that the only other thing I bought was some twine for something like $1.25, so we'll round up and call it an $8 project.

I wrapped the lights around the tree and was pleased with the results. And I already had the beginnings of a banner plan swirling around in my head, but I wanted something to hang from it, too. Then, when I was going through the Halloween box in the basement, I found this!


Not the orange kitty, the other thing. I have no idea why I bought this to start with; I can't remember ever doing anything with it. But there it was, festooned with black and orangey gold plastic balls.

So I disassembled it and hung the balls on the tree. And stood back to admire the results. Now all it needed was a tiny little banner.


Ideally I would have cut up some Poe for this, but I didn't have any handy that I didn't mind destroying. So instead I went with this falling apart copy of All the King's Men (don't worry; I have another, not falling apart copy), a book I like to refer to as my favorite book that I've never managed to make it all the way through. Ahem.


It was not a very spooky book, but that Robert Penn Warren did have a bit of a potty mouth, so no one should look too carefully at the text behind my nevermore letters.

I just drew a little banner shape and then folded the pages so that I could cut a bunch out at once:


I just did the letters freehand, figuring it would not be too arduous since they're so tiny:


I fretted for awhile about how I was going to string the letters together. I kept thinking I'd need to punch holes in them and put the string through that and that the book pages were too fragile to handle it....and then I remembered: what can do anything? Scotch tape can do anything! I bought the aforementioned black twine:


And then I flipped it over, ready to be dazzled by my own handiwork.


Umm. This is why I don't sew. Exceptionally poor spatial reasoning skills. Fortunately, they all came off without ripping.


Much better!

Then I put it on my tree, and it looked so beautiful I almost cried. I love it. I'm going to decorate everything in my house with a tiny banner. Like on my kitchen chairs, I'll just put tiny banners that say "chair." Or whatever.


I haven't plugged in the extension cord yet, so I had to drag it into the kitchen to take this one:


Linking with:


The Lettered Cottage

Thursday, November 1, 2012

Halloween!

I kind of miss having little kids who I can talk into whatever adorable themed costumes I want. But I love that my kids usually go for themed costumes all by themselves, with no coercion (since they started picking their costumes, we had a Harry Potter year and then a Mario, Luigi, and Wa-Luigi year). This year they all wanted to be characters from Hetalia. Hetalia is some sort of Japanese anime type thing, and my kids (particularly Ari) are very into it. That's about all I know. Oh--I also know that you have to order the costumes from some overseas company and pay a lot of money for very low quality stuff. Yay! Either that or you have to have stronger sewing or thrifting powers than I have.

And they all declared this year the best Halloween ever, so I guess I will have to accept their happiness as a substitute for the overwhelming adorableness of Halloweens past.


Ari was America, Milo was China, and Gus was Japan.


....and Fiesta was the horse that the Headless Horseman rides. 

First up on Halloween, we had a party at LEO, the place where the kids take classes. And that evening, because we live in a Real Neighborhood now, there was a pre-trick or treating costume parade for all the neighborhood kids. Our friends came over to join us for that:


Then we made our way around our neighborhood collecting candy. Two people wanted to take Fiesta's picture, which kind of made up for my lack of a dressed up baby or toddler. Next year! I'll have a dressed up dog AND a baby.

After finishing off our (small; only about 60 houses, and a lot of them didn't have lights on) neighborhood, we headed down the street to our friends' neighborhood, met up with some more friends, and hit all the houses there (after touring my friend Tracy's awesome haunted house on her porch. I wish I had pictures of that). Then after a brief candy-swapping session, we all came home, very tired and full of sugar.

We were a little late with pumpkin carving this year, but it did finally happen, a few days before Halloween.

We opted for Sparky, from Frankenweenie, using a template we found at Mommy Musings.


Wednesday, October 17, 2012

Wherein I take craftiness to new (for me) levels

Remember when I posted about my anatomy flashcards last week and said that they were kind of a rough draft? I knew I wanted them to look more vintage-y (or, for this set, since they're supposed to be Halloweeny, more old and spooky). I thought this would probably mean buying some sort of specialized card stock, so yesterday I googled stuff like "vintage look cardstock." I found some expensive things that looked...sort of like what I wanted. But my googling turned up something even more interesting:

Did you know that crafty people use their crafty powers to make things look old all by themselves?! I think those crafty people might be on to something after all! And even though I don't have a craft room or even a craft closet (or even a craft drawer), I already had everything I needed to accomplish the old and spooky look for myself.

Here is my supply list:

1. a cup of tea
2.small paintbrush

And if I hadn't had a paintbrush, I could have used a rag or a sponge or a paper towel or, like, an old sock.

I used this tutorial from Missparty.net as my guide, but then I just kind of winged it. Looking back through it, I see that I didn't follow instructions very carefully at all, actually. But it still worked how I wanted it to! That's my kind of craft--the unscrewupable kind!

I made a cup of tea with two tea bags (regular old Publix-brand tea) and let it steep for 10 minutes. Then I got out the little brush we keep in the kitchen for kitchen-type brushing needs, laid out all the flashcards on my counter (if I had white laminate or something, I probably would have put something down first as a precaution against staining, but since my counters are granite and sort of tea-colored to start with, I didn't worry about it). Then I brushed them all over with tea. I went back around the edges with another coat (and this is where I wish I'd taken a little more time, since you can see the edge of the darker stain on some of them....I wish I'd made it look a little more organic, but oh well).


Then I let them dry until it was time to go to bed and I couldn't wait any more, and I hung them back up. 


Much happier with them now. I still want to work on the original document and get them more centered, and then make a template for cutting them out so they're more regular in size, but I'm happy enough with these that I can wait on the next set to worry about that.

Here, for comparison purposes, is how they looked before:


Linked with:
HookingupwithHoH

Chic on a Shoestring's Flaunt it Friday

Wednesday, October 10, 2012

DIY flashcards

Last week I posted a link to some free printable alphabet flashcards that I was thinking of using in my dining room. While my natural tendency IS sometimes to decorate as if I were a five year old, I decided these were probably a bit too juvenile for my dining room purposes (heck, I don't even HAVE a five year old right now, my youngest being nearly SEVEN). I thought black and white instead of so much color might be a little more grown up (and also a lot cheaper to print, since I could use the laser printer instead of the ink jet).

I also liked the idea of designing them myself and making several different sets that could be switched out from time to time. I made two sets last weekend: an animal alphabet set and a human anatomy set (for Halloween!).

(I feel a little ridiculous posting anything resembling a tutorial, since I assume anything vaguely crafty that I can manage to figure out, everyone else can, too, but....) Here's what I did:

1. Found free images to download and use. My main source for the alphabet set was The Graphics Fairy, and my source for the anatomy set (and a few of the images for the alphabet) was Clip Art Etc. I wanted vintage-y looking black and white line drawings in both cases. The Clip Art Etc site has nothing but that, as far as I can tell, and lots of it. Graphics Fairy is more diverse, with a great selection of color images, too and wider ranging subject matter, but if you're looking for a line drawing of a quahog for your Q card, Clip Art Etc. is your place.

So like this:


And this:


2. Downloaded a font to use from Fonts 101. I picked Colonial Dame because, you know, Boxy Colonial and all, and also because I thought it had a nice old-time schoolhouse vibe to it:


3. Went into Open Office and made the flashcards. I'm actually still playing around with the format, because they ended up printing kind of off center and that made cutting them out challenging. But I did a landscape page with two columns, centered and sized the images, and then added the text. I'd also like to find a way to have them print with guidelines for curved corners and a regular size when they print, so I can just cut along those.

4. Went to Target and found the cardstock selection woefully inadequate for my needs. They had either plain white or packs with, like, 5 sheets each of a gazillion different colors. What I really wanted was some kind of light brown color, maybe with a little texture to it. But I got white instead. I'm going to find the kind I want elsewhere and reprint I think (or at least do the next set on the different paper), but I didn't have the patience to wait.

5. Printed and cut! Cutting was more complicated than I wanted it to be, owing to the aforementioned formatting issues. Consider this flashcard set as something of a rough draft.

6. Strung twine across a wall of the dining room and hung up the flashcards with clothespins:


Linking with:
My Uncommon Slice of Suburbia


Saturday, September 29, 2012

Becoming a Seasonal Decorator

I am not, historically, someone who decorates extensively for holidays. I mean, we put up a Christmas Tree. And we usually talk about putting up lights and then don't get around to it. But I LOVE holidays, and I love at least the idea of decorating for them, so I am trying to turn over a new leaf here.

My attempts to become a better person through seasonal decorating started last year, right after Halloween, when I bought what seemed at the time to be a whole bunch of Halloween stuff on clearance. And then I added to my stockpile throughout the year with thrift store finds.

But when I pulled it all out this year....it didn't seem like as much as I had thought. And also I didn't like some of it anymore. So another trip to Target for sadly non-clearance stuff was necessary.

I'm still tinkering. Somewhere around here we have a big, garish light-up Frankenstein who needs to hang out on the front lawn I guess. He's not quite as....classy as I like to think my other stuff is, though, so I'm holding out and making excuses to the kids when they ask about him. But we did quite a bit this week, so it's coming along.


This guy was a thrift store find a few months ago (and the doormat was one of my clearance Target buys last year). I'm not sure if he's supposed to be a plant holder or not (we might replace the mums with candy on Halloween), but I thought they would be fun.


Graveyard from combo of dollar store and Target clearance tombstones. And those skulls are from the thrift store, too. They're supposed to light up, but I don't think the lights work. I might ask Dave to tinker with them a little more to make sure.


Then we have my attempt at a centerpiece. Which I cannot seem to leave alone. Gavroche the cat wanted to be in the picture because he's all orange and Halloween-y. Okay. So the owl candleholder and the brown pumpkin are from the $2.50 section at Target, and the fake acorns and pinecones and whatnot in the glass pumpkin are from the $1 section. They keep settling, so I need to go get more. Everything else is from their regular Halloween section, and I think it was all in the $2-6 dollar range. Word of warning: the owl candleholder is adorable and all, but it doesn't open up, so it's really hard to get the damn candle in there. And then, when you do, it burns down to nothing in half an hour, and you're back to start. Grr....

This is the first incarnation. Turns out everything has moved around almost as much as the cat.


But everything was kind of too level, so I started adding in books. First up some Victorian Ghost Stories...


More books! I'm not sure why I turned the skull the other way for this one. We are not as well stocked on Halloween appropriate books as on some other genres, but I did my best. Shirley Jackson's The Lottery...doesn't get much creepier than that story, right? And Hawthorne's Twice-Told Tales. I can't remember for sure, but I think maybe some of them are scary? Or at least vaguely gothic? Then Kristi came over and I told her about how I'm still worried it's too same-heighty, and she suggested tall candlesticks. Yes! I think it needs that. They didn't have any at Target, though, so I will have to keep looking.


And THEN I thought the stick-y brown pumpkin was too much the same size as the glass pumpkin, so I bought a million gourds for 69 cents each at Trader Joe's, and did this. And that was just a couple of hours ago, so who knows what will happen next. I am new to centerpieces. Also, I should mention that the cats like to lick the gourds. I don't know what's up with that.

Linking with Everything Fall Link Party at My Uncommon Slice of Suburbia