Saturday we did all our our Easter prep work. Like the egg dyeing. And my trip to Target to get the last minute egg dyeing kit. Some time last week I thought maybe I was going to find some amazing homemade egg dye recipe to make with the kids. Then I looked up recipes, and the first one I read started with, "take a pound of blueberries...." And then I decided I'd just get the $1.50 kit from Target instead of spending several times that on a pound of blueberries that we wouldn't even get to eat (and that just for the BLUE eggs).
So, much like with blueberries, I can't stand the thought of wasting eggs just to make them look pretty. Partially because we buy expensive happy eggs because we used to have chickens, and I love chickens, and I don't want the ones who lay our eggs to be sad. And Dave's the only one here who much cares for hard-boiled eggs. All of this to say....I only let the kids dye six eggs. Two eggs each! This is going to be one of the stories they tell about me when they grow up to demonstrate how crazy their mother is. Or how much she loves chickens. Same thing, pretty much.
Anyway, here they are, decorating their stingy allowance of eggs. The cheap egg dyeing kit came with a "magic crayon" so that one can draw designs on the egg that the dye won't cover up.
I appreciated how pretty the eggs looked being dyed in our Ikea bowls. Although I realized too late they were too shallow for submerged eggs. But we turned them around after a few minutes (or transferred them to a different color), and that all worked out fine.
Six eggs!
Next, we moved on filling up eggs for the next day's egg hunt at my grandparents' house:
Abe sat around having really pretty blue eyes while this was going on:
For our final Saturday task, we made bunny racecars!
I found this idea for bunny race cars made out of Reese's eggs at Kitchen Fun with My Three Sons, and I knew I had to make them. Because look at them! Annie's even makes gluten-free bunny cookies. Let me tell you, never will you get so much credit for doing so little as when you make Reese's egg bunny race cars. People love these. They love them on facebook and then they love them at Easter dinner at your grandparents'. But they are SUPER easy. No cooking; you just have to stick them together. The hardest part is cutting out the little slots for the bunnies without cracking the eggs too much.
We put out the Easter baskets after the kids went to bed. I'm nearly as stingy with Easter baskets as with eggs. Apparently, at some point since I was a kid, Easter has turned into this sort of Christmas-like event wherein you receive actual presents instead of just chocolate bunnies. But here we do a book and a chocolate bunny. Unless I don't make it to Target until the day before Easter, which is usually, and all the good bunnies are gone (they did have some horrifying "gummy bunnies" but I passed on those). Then they get a random assortment of what's left at Target. Like Peeps and Cadbury cream eggs. But I did order the books from Amazon DAYS ago instead of just getting whatever they had in the measly Target book section like I usually do. These books are award winners!
Oh, Abe can't eat candy, so he got two books. One of them was too big for his basket (also purchased at Target on Saturday. I was pleased to see that they're still selling wooden baskets with cloth liners, so that his can coordinate with his big brothers').
Sunday morning we....tried to go to church. Really, we did! We're between churches at the moment, and Ari had expressed some curiosity about the Catholic church that is in our backyard (well, it's right behind our backyard, anyway). It's the church I went to as a kid, actually, and that my grandparents (not the egg hunt grandparents, though) went to for a very long time. So, even though I'm not Catholic anymore, we thought it might be nice to go over there, have the kids see the church I went to when I was young, and, in the bargain, not have to deal with Easter church traffic, since we could walk there. Plus it would be kind of lame to show up for the first time at a church you might actually go to long term on Easter.
We got there a good 20 minutes before the 11 o'clock mass started and.....yeah. It was completely packed. Completely. So, we walked back home, feeling kind of sheepish. But I did take this nice picture of the kids dressed up:
Too bad they didn't have a plaid shirt in Abe's size. But the plaid shirts have sort of that same aqua color in them, so it all kind of works. Ari didn't want to match. But he didn't mind coordinating.
And then to my grandparents' house to visit with extended family and have (in between rain showers) an egg hunt. I am not thrilled with my egg hunt pictures for the most part (the kids kept moving). But here's what I've got:
So there you have it.
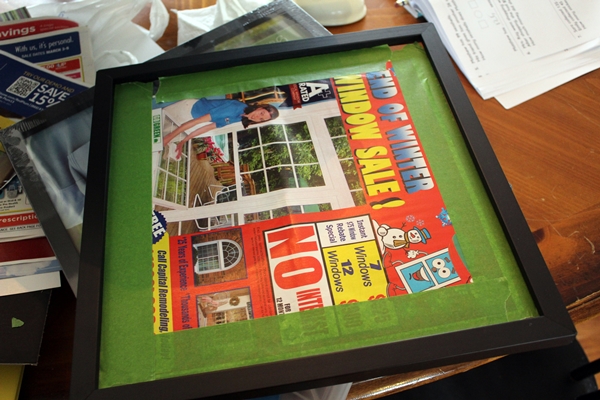
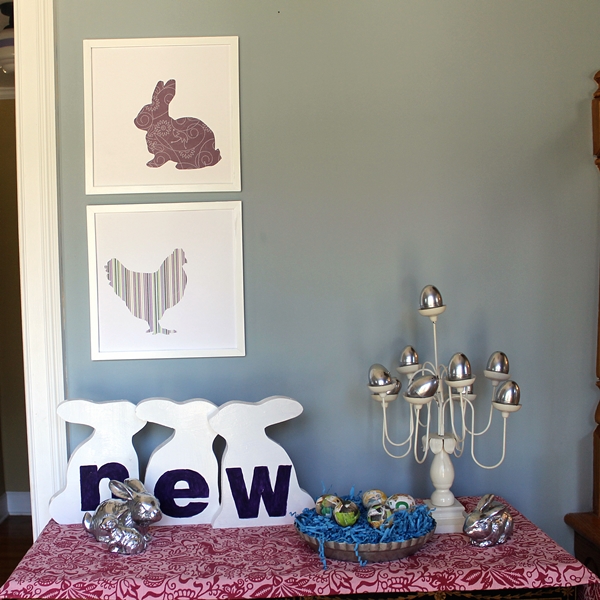
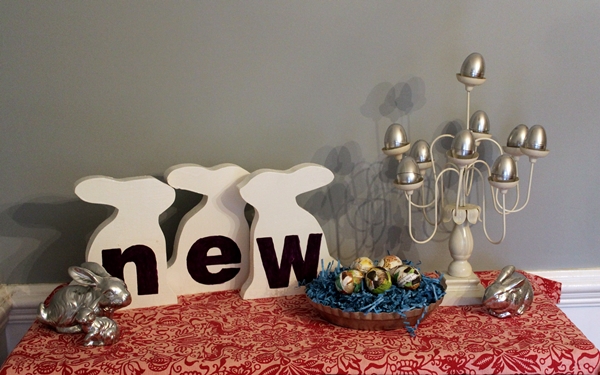
We spent today working on big spring break project #1. And we're not finished yet. But tomorrow we're changing gears and working on big project #2 some. So who knows when I'll actually get to post about said projects. Hoping to get to a couple of smaller projects, too, though!
Showing posts with label Easter. Show all posts
Monday, April 1, 2013
Friday, March 8, 2013
Bunny and Chicken Silhouettes: The Last of the Easter Decorating Extravaganza
That's right--Easter decorating week is nearly over! Back to our regularly scheduled tween room redo (with maybe some gardening action thrown in!) after this.
I've seen a ton of silhouette art around lately (it occurs to me that most of my posts could be Pinterest Challenge posts, really), so I decided to throw some into the Easter decorating mix here.
This really should have been the first post that didn't turn into a novel, so simple was the concept, but then I ran into a little trouble with the frames, and I will, of course, share my tale of woe with you in agonizing detail.
I started with two sheets of scrapbook paper and two $5 frames (they were half off, as they seem to be most of the time) from Hobby Lobby. Hobby Lobby stubbornly refuses to sell cheap white frames, but I had a plan. I would just spray paint them white. Remember back last week when I learned an important lesson about using primer when spray painting frames? I remembered this, too, so I got out my can of primer and.....realized it was empty. Oops. But surely these frames wouldn't need primer! I told myself optimistically. Then I started to take the glass out of the frames. And realized I couldn't manage to maneuver it out of one of them. Oh, Hobby Lobby: now I see why your frames are so cheap! Undaunted, I taped up the glass on that frame:
...and got to painting. And, yeah, these frames could've used some primer, too. The black showed through, mostly along the edges. So when Dave got home I asked if he could slap a coat of the latex paint that he'd used on the last frame on these, too.
He came back a few minutes later, holding that frame from the picture up there. "I tried to take the glass out of this," he explained, "but it broke." He seemed very surprised that such a thing had happened to him. Apparently I should have explained about that frame and its unbudgeable glass before he went down to the basement.
I glumly contemplated another trip to Hobby Lobby. "Maybe," Dave suggested, "you could just use the frames without glass." I thought about this. And then that's exactly what I did. Because it was easier than going back to Hobby Lobby.
The part where I found rabbits and chickens and cut them out went smoothly. I found the outlines here. Then I printed them out on cardstock, cut them out, traced around them onto the back of the scrapbook paper, and then cut THAT out. Lots of cutting.
The I taped them down to white cardstock with my best friend, double sided tape, and put them in the glassless frames. And then MORE (thicker) double sided tape to hang them on the wall.
Also, I've been meaning to move the Old Lady Cabinet out to the foyer for awhile now, and we finally did it the other night. For Easter. I think the Old Lady Cabinet might not be long for this house. She's a little stuffy. But she fits in the foyer beautifully.
Anyway. All done Easter decorating!
Linking with:
Monday Funday
Classy Clutter's Spotlight Saturday
Under the Table and Dreaming's Sunday Showcase
Hop to it Link Party
Tuesday's Treasures at My Uncommon Slice of Suburbia
Tutorials and Tips at Home Stories A to Z
Stone Gable Blog's Tutorials, Tips, and Tidbits
Transformation Thursday at The Shabby Creek Cottage
Hookin' Up With House of Hepworths
Craftionary's Friday Link Party
Inspiration Gallery
Tatertots and Jello's Weekend Wrap-Up Party
Wednesday, March 6, 2013
Fourteen Eggs....Transformed! (Much Like the Bunnies Were, Only Different)
I continue to decorate for Easter. Those who saw this picture (or a similar one) on Instagram:
....will observe after this post that I'm getting pretty close to the bottom of my giant pile of Easter decorating stuff.
Today we deal with eggs, the natural follow up to bunnies, of course.
See that funny white candle holder thing? I picked that up for $4 on my fabled Friday night thrift shopping expedition. I think it might be the least safe thing ever to actually put candles in...it's really wobbly and it looks like it's been repaired with surgical tape in one place. But I liked it, so I got it anyway, and then when I got home with it, I thought, "you know what's shaped pretty much exactly like candles? EGGS!" Well, that's not exactly what I thought. But something along those lines.
I had a few different ideas for what kind of eggs I was going to stick in there, but it didn't take long for me to realize that of course I needed more shiny silver things in my Easter display. So I broke out the Krylon again, along with a bunch of plastic Easter eggs, and set to work:
Magic!
And here they are in the funky candelabra:
I find the shadow on the wall very distracting, but I couldn't make it go away. The sun is stubborn like that.
Then I had these styrofoam eggs from Hobby Lobby, and I also, it just so happens, had some Little GoldenBooks that I picked up a few months ago specifically to destroy in some crafty project. I decided to use "My First Counting Book" because it had pictures of ducks and bunnies and other Eastery creatures in it.
The end result is colorful and a little creepy, because the eggs are covered with little decapitated chick pieces and whatnot:
I put them in an old pie tin that I found at a different thrift store a couple of weeks ago. Vintage pie tins are the new Easter baskets.
Also, I had this....I don't even know what it's supposed to be...this....fabric that I bought awhile back and never knew what to do with. So I brought it down and put it on the old lady cabinet and then set all my Easter stuff on it:
One more project! And then I will stop bombarding you with Easter stuff! I feel much more in my element painting dressers and cutting out whales and stuff, but it's good to challenge one's self with some holiday decorating from time to time, right?
Linking with:
Hop to it Link Party
....will observe after this post that I'm getting pretty close to the bottom of my giant pile of Easter decorating stuff.
Today we deal with eggs, the natural follow up to bunnies, of course.
See that funny white candle holder thing? I picked that up for $4 on my fabled Friday night thrift shopping expedition. I think it might be the least safe thing ever to actually put candles in...it's really wobbly and it looks like it's been repaired with surgical tape in one place. But I liked it, so I got it anyway, and then when I got home with it, I thought, "you know what's shaped pretty much exactly like candles? EGGS!" Well, that's not exactly what I thought. But something along those lines.
I had a few different ideas for what kind of eggs I was going to stick in there, but it didn't take long for me to realize that of course I needed more shiny silver things in my Easter display. So I broke out the Krylon again, along with a bunch of plastic Easter eggs, and set to work:
Magic!
And here they are in the funky candelabra:
I find the shadow on the wall very distracting, but I couldn't make it go away. The sun is stubborn like that.
Then I had these styrofoam eggs from Hobby Lobby, and I also, it just so happens, had some Little GoldenBooks that I picked up a few months ago specifically to destroy in some crafty project. I decided to use "My First Counting Book" because it had pictures of ducks and bunnies and other Eastery creatures in it.
It's kind of sad that I tore up the book because now Abe will never learn to count, but I'm not about to let my baby's education stand in the way of my craftiness.
After an intense and prolonged search for the Mod Podge ( turns out I had packed it up and put it in the basement for some reason), I got started on the eggs. Basically, I tore the counting book into little pieces and Mod Podged them onto the eggs:
The end result is colorful and a little creepy, because the eggs are covered with little decapitated chick pieces and whatnot:
I put them in an old pie tin that I found at a different thrift store a couple of weeks ago. Vintage pie tins are the new Easter baskets.
Also, I had this....I don't even know what it's supposed to be...this....fabric that I bought awhile back and never knew what to do with. So I brought it down and put it on the old lady cabinet and then set all my Easter stuff on it:
One more project! And then I will stop bombarding you with Easter stuff! I feel much more in my element painting dressers and cutting out whales and stuff, but it's good to challenge one's self with some holiday decorating from time to time, right?
Linking with:
Hop to it Link Party
Monday, March 4, 2013
Six Bunnies....transformed!
I think there's some sort of ancient proverb that says something like, "She who starts 14 projects all at once at the beginning of the weekend will have trouble finishing even one of them by the end of the weekend." Yeah. Back on Friday, I was very proud of my ambitious plans and all the stuff we were going to accomplish.
My list looked like this:
1. Fix and paint lamp
2. Ari's dresser
3. Easter stuff
I know it doesn't look like 14 things, but it turns out I forgot to narrow down "Easter stuff" at all, and it turned into....lots of things.
Saturday morning, we tore right into the list and got out the lamp I bought months ago at the thrift store (along with a shade from Target), intending to paint it and use it on the desk in Milo and Gus' room. At some point we discovered that the switch was broken, which set us back even farther while we put off picking up the stuff to repair it. But Saturday morning we were ready! Whoo hoo!
See? All the stuff is right there! Ready!
But then....
Basically, Dave couldn't figure out how to get the lamp apart to fix it. The bolt holding stuff together is way up at the top of that tall, skinny ceramic base, and, he said, even if he could get it out, he didn't know how he'd ever get it back together again. If anyone has any ideas, please let us know.
Okay! So! Moving on!
Ari's dresser. We actually did make progress on this. Dave sanded it down and painted it and we got started on its secret transformation. But it turns out paint dries more slowly than I would like for it to, so it's going to be awhile before we can finish it and blog about it.
That leaves us with...Easter stuff. By my count, there are two more posts coming about Easter stuff, but today I have bunnies. I will warn you in advance that I don't think there's anything Craftgawker worthy here. But there are bunnies, and that really ought to be enough.
Friday night we went to the same thrift store where we got our big heavy dresser (half off!) right before they closed for renovations. They've been back open for a few days now, so I wanted to check out all the new fancy there. They have all new shopping carts! With wheels that actually turn! So that was exciting. I was so excited about the new shopping carts that I loaded mine up with, maybe, too many things. Maybe. But everything was 20% off! And there was a walrus bottle opener for 99 cents (or more like 80 cents after the discount, but he was totally a bargain already at 99).
Among my finds were four of the six bunnies I'm going to talk about.
The first three bunnies:
The bunny on the left--that sort of depressed looking one--is the one I got Friday. The other two were already here. The red bunny was in the den, and the little bunny in the middle has been stuffed into a drawer for the past 8 months or so. Poor bunny.
If the bunnies look a little more excited in this picture, it's because they're about to undergo a dramatic transformation, courtesy of that can of Krylon Premium Silver Foil Metallic paint with "True Metal-like Finish."
I was pretty impressed with this stuff. As soon as I started spraying, the bunnies looked all shiny and metallic. I did a few light coats, but I'm not sure I really needed more than two. SO shiny!
Incidentally, I am declaring silver and dark purple the new Easter colors. Down with pastels!
Okay, so here they are in all their shiny glory:
And the other three bunnies? Just as I was about to check out at the thrift store Friday, I spotted these three wooden bunnies hanging out. Dave pointed out that they would be pretty easy to make with a jigsaw, but they were $1.29 each, so it really seemed best to just get these and give the jigsaw a break.
One of my big Easter decorating plans was to have letters spelling "new." I'd originally thought of buying freestanding cardboard letters from a craft store and painting them, but when I saw the wooden bunnies I decided they would be the perfect conduit for my letters.
I thought "new" for Easter/spring was kind of clever and fresh, but no one in my family seemed to get it. This conversation happened over and over all weekend:
member of my family: what are you spelling on those rabbits?
me: new
momf: why?
me: for Easter...you know, rebirth, new life, brand new fluffy baby chicks, and all that
momf: (blank look) oh.
Anyway.
In retrospect, I should have sanded these down and started over with the paint, because the paint job was looking pretty rough. But what I actually did was just put a fresh coat of white spray paint over them.
Dave and I spent a ridiculously long time trying to figure out how to print out some letters to use for a guide. We didn't want to use up all the ink to just print them filled in black, but, after many minutes of effort, we couldn't figure out how to turn them into outlines. So, in the end, I just printed out the letters on cardstock (arial black, size 500), cut them out, and traced around them with pencil.
The "w" was too wide for the bunny, so I redrew one, the same height as the other letters but skinnier:
Then I filled in the letters with purple acrylic paint and a little craft brush:
Here it is after one coat:
Comparing one coat with two:
I wound up doing three coats before I was happy with how dark it was. I wonder if I should have stuck with the more expensive acrylic paint from the art section that I had picked out but put back in favor of the cheap stuff in the craft section.
The final result:
(I put a lot of thought into which way the bunnies would be facing. I almost made them all face the same direction, so it wouldn't seem like one bunny was left out, but then when I lined them up to look at them, I liked them better this way. Instead of two bunnies talking and ignoring the other bunny, try to think of it as N bunny and E bunny out for a morning frolic and happening across W bunny coming from another direction).
Then I got all the bunnies together for a big bunny party/photo session:
What's going on right now is that I have all these Easter projects flooding in and no idea where to put them all or how to arrange them. Let's hope that gets better as the week progresses!
Linking with:
Tutorials, Tips, and Tidbits at Stone Gable Blog
Hookin' Up With House of Hepworths
Somewhat Simple
The Inspiration Gallery Link Party
The Shabby Nest's Frugal Friday
Tatertots and Jello Weekend Wrap-up Party
Subscribe to:
Posts (Atom)