Showing posts with label August and Milo's room. Show all posts

Monday, February 11, 2013

The Super Secret Project: The Day the Glue Gun Let Me Down


And now, at last, I reveal the super secret project that I actually already mentioned, back when I posted about August and Milo's room. It's also a really simple project, both in theory and in execution, so I hope no one feels too let down by all my "super secret" build up.

I came across the idea to make a lego table out of Ikea Trofast shelves awhile back on SunScholars blog:


Pretty cool, isn't it? I loved the way it looked and the idea of the built in storage. But I wanted something a little smaller for Milo and Gus' room, so I decided to make theirs out of just one Trofast shelf, instead of two attached together. 

We picked up the shelf and bins (I wanted all green, but they didn't have green for the bottom ones, so we went with white instead) at Ikea last Sunday. Then I looked around online to find the best combination of baseplates. The best deal and the best fit for the single shelf was 2 of the extra large gray plates. Each one measures 15 by 15 inches, and the shelf is around 17 by 36, I believe, so two of them would fit nicely with just a few extra inches. 

I waited for the baseplates to get here from Amazon. They came in a ridiculously big box:


...packed in a million inflatable bag things that the kids have been having much fun with:


Then I sat down to start assembling the shelf:


I got about this far:


...before Abe decided he was all done with his fun butterfly mat. Then Milo held him for awhile and bought me another 3 minutes or so:


Then Dave came home and I finally finished putting it all together. Trofast shelves are relatively easy to assemble, as far as Ikea stuff goes. 


Next I broke out the glue gun to attach the baseplates to the shelf. First I attached them to each other with legos, to make sure they'd line up correctly once they were on the shelf, as per the suggestion of Sun Scholars:


There was a lot of area to cover, and I had to put a new glue stick in the glue gun halfway through, but I went as fast I could, got a bunch of glue on there, turned them over and pushed down, and....they didn't really stick at all. Yeah. I'm not sure if the glue had too much time to dry before I could get it turned over or what, but, at any rate, glue gun fail.

Dave suggested liquid nails. But our liquid nails container said it was no good for plastic.

So, finally, I went with heavy duty double sided tape. This is what Sun Scholars used, but she said it was because they wanted something less permanent and suggested that glue would probably be better if that wasn't a concern. Or maybe not, it turns out. I'm sure there's some kind of glue like substance that would work, but going with double sided tape seemed easier than hunting said substance down.

So the next day Dave picked some up at Target and, after a lot of time spent picking dried glue off the plates with my fingers, I gave it another shot.


That was the whole roll of tape. It costs $4 a roll and doesn't go very far. But far enough, it seems. So far it's holding up very well. 

Then we hauled the finished project up to Milo and Gus' room and turned them loose to rehome the legos and start playing. They have some sort of elaborate organization system in mind, so the transfer from the old bin is still a work in progress, but they've been having fun.


I moved that shelf that used to be against the mural wall over to under the window, where the bin of legos used to be. I wanted the lego table this way so that a kid could be on either side of it. Within an hour, it looked like this:


So there you have it. An easy lego table and, I'm hoping, a way to keep legos where they belong instead of all over the floor and under the bed.

Not the thriftiest project in the world (the Trofast shelf is $69. The bins are $4 for the big ones and $3 for the smaller ones. Base plates were around $15 each), but it saved us some money over buying a pre-made one and we were able to get it exactly how we wanted as far as size and amount of storage space.

Linking with:


Classy Clutter's Spotlight Saturday
Under the Table and Dreaming's Sunday Showcase Party
Tuesdays Treasures at My Uncommon Slice of Suburbia
TwelveOEight's Pretty Things Party
Tutorials and Tips at Home Stories A to Z
From Dream to Reality at the DIY Dreamer
Tutorials, Tips, and Tidbits at Stone Gable Blog
Hookin' Up With House of Hepworths
Somewhat Simple
The Inspiration Gallery Link Party
Chic on a Shoestring's Flaunt It Friday
The Shabby Nest's Frugal Friday
Tatertots and Jello's Weekend Wrap-up Party

Tuesday, January 29, 2013

Milo and August's Room: Updated

Another room for the house tour! I'm not really meaning to not post them (up on the little house tour tab that is)  until I have them looking somewhat finished, but it's hard to work up the motivation to get it done otherwise.

Anyway, when we last left Milo and Gus' room, it was stuffed full of loft beds and I had big plans to swap them out for bunk beds, leaving more room for playing and the desk they both were begging for. Then I reported on my big plans to buy said bunk bed from Target. Then I DID buy that bunk bed. Then some months passed. And now I'm finally posting about how the room looks now.


Here's a view of the room looking in from the door. We decided on a forest room before we moved in, and I let them pick out the wall mural from Amazon. It took them a very long time to agree on one. The kids rooms were the first to get painted. Before we moved in, this room looked like this:


Stripey! So we put up the wall mural and painted the rest of it Martha Stewart's Saguaro Green. Gus has allergies, so he's not supposed to have a ceiling fan in his room (plus that one was ugly), so we took it down and put up the bamboo striped light fixture (from Lowe's, I think....last time I looked I couldn't find it on the website, though).


The curtains are from Target. We needed something right away over the windows when we moved in, because they face east in that room, so the sun comes right through them every morning. And we went the cheap route and just bought 2 panels (back when we moved in in May we were still trying to sell the old house, so money for house stuff was very tight until it finally sold at the beginning of August). Then when I regretted the decision and tried to buy 2 more, they didn't have them anymore. But I'm still too cheap to buy FOUR new curtain panels, so there they stay for now.

I mentioned the desk in my post about the shelves over it....it's a thrift store find, and I paid $50 for it. It's not terribly wide, but it's very deep; we had to take the top off to fit it through their door. I toy with the idea of painting it and/or replacing the hardware, but I think I like it as is in the room, at least for the time being. The chair is just an extra dining room chair--until I find a dedicated desk chair I like.  I think you can play "Spot the Orange Kitty" with most of these pictures. He's not really supposed to be in there, so he darts in anytime the door opens.

We made the shelves, based on some reclaimed wood shelves I saw on West Elm's site. More about that here.


Those owl containers are from Ikea. On the bottom shelf there's a giant pinecone Gus found in California and assorted animal bones that they traded for at the nature exchange at our local nature center. Also some rocks.


Toys! I'd like to build them a lego table with storage for all those legos and a top made of base plates. And maybe I will. Soon. I'd also like some comfy chairs (beanbag?) for reading somewhere in this area.


Closets. Exciting stuff, I know. This is why this room is for the boys who share....two closets. No dressers in the room, you might have noticed....all the clothes are in the closets. I'd take a picture, but it's always kind of messy because they put their own clothes away. Also because there are usually more legos in there. Legos are everywhere. Each closet has a shelf with 8 cubby holes in it, and each cubby has a designated type of clothing. Long sleeve shirts, short sleeve shirts, pants, pajamas, underwear and socks, etc. (Underwear and socks and pajamas have pull out cloth drawers to keep everything contained). So they can put everything away themselves easier than in a dresser, I think, and, again, it opens up more space in the room for playing.


Better view of the whole glorious wall mural.


(spot the orange kitty!) The cheap Target bunk beds. Comforters are also from Target. As are those lights, which were the last thing we needed to get around to finally hanging up (last night; we've had them since May, I believe) before I took pictures. I'm happy with how the bunk beds look and how compact they are, but they are more wobbly than I would like. They mostly just wobble when adults try to climb on them to make the bed or hang lights up over them or something. So it's not a huge deal. But I am not thrilled with it.


The lights make cool patterns on the walls. We should have hung them up months ago!


And the doorway, with its weird little nook area. They wanted a bulletin board, so there it is. And the owl hooks are also from Ikea.

There's not a lot of room for hanging stuff on the walls....those two walls are taken up by windows and closets, and the other two by bunk bed and wall mural. But I guess once you have a giant retro wall mural on one wall, much else would be overkill.

Sharing with:
Tuesday's Treasures At My Uncommon Slice of Suburbia

Monday, January 21, 2013

DIYAS 15/15 Project: Reclaimed Wood Shelves


Thursday morning I had a baby, but Wednesday night I was at Home Depot, buying shelf brackets for this project.

When I saw the announcement for the 15 minute/$15 project link party from the Do It Yourself Action Squad (Broke Ass Home, Middle Class Modern, Sandpaper and Glue, and Interiors by Kenz), I immediately thought of doing this project for it, because I was pretty sure it would fit the criteria, and it was already my next planned project. But then I was worried I'd have a baby and not have time to get it finished. But THEN because I am so awesome Dave was home to do pretty much everything while I held the baby, I did BOTH!

Disclaimer: I have no idea how long we actually spent making these shelves, because when you have a brand new baby you get interrupted every three minutes. But I think, in theory, with no baby, one could conceivably finish at least one of these shelves with something like 15-20 minutes of hands on time. Let's pretend. I just had a BABY, so I deserve a little leeway, right?

It is right on with price, though, per shelf: we already had the wood and stain, and the brackets were $6 each, so $12 a shelf! Yay!

I should have taken a before picture of the kids' desk (this in Milo and August's room) to show you why we needed these shelves. But, really, I'm pretty sure if I wait a week it will look just the same, and I can take a "before" picture then. Picture a sea of legos, paper, a wallet that Milo claimed was irretrievably lost just last night, raccoon skulls, etc. all over the desk surface. I thought it would be a good idea to have a designated display space for some of that crap, and Milo and Gus were very pleased about that idea.

Looking around online, I found these reclaimed wood shelves from West Elm that were pretty much what I had in mind and would fit in nicely with the forest room thing we have going on in there:


Only they're $58 each for the smallest (2 foot long) shelf. Mmm hmm.

Here's what we did instead.

We "reclaimed" some wood from under our deck. I had wanted to use the wood from the old stairs we tore down, but that wood had been out in the weather and was soaking wet, so what we wound up using is actually brand new wood, leftover from the new stairs. We used a 2 by 6 board.

Next we measured the space where we wanted the shelves and decided on 28" for the length.


I had to take a picture of Dave cutting the wood because, he told me, "I like for there to be pictures of me using power tools on the internet."

Next up, we let the kids "distress" the wood to make it look more genuinely reclaimed. And also because kids like hitting things with hammers. Warning: if you let your three boys distress your wood for you, it might wind up REALLY distressed. I was kind of worried when I saw just how distressed our poor boards looked when they were finished, but once the stain was on it looked okay again. Dave got so carried away with the distressing that he forgot to take pictures of the kids doing it (I was upstairs, shielding the baby from all the chaos). So we had to recreate the scene:


After the enthusiastic distressing (which consisted of just banging assorted hammers, screwdrivers, etc into the wood), Dave gave everything a quick sanding with the power sander.

Then we brushed on the stain (Minwax's dark walnut, leftover from the whale) and let it dry overnight.


We bought two different sets of brackets, because we weren't sure which ones would fit. The ones I liked better turned out to be too big:


But they also would have put us $2 over budget, so perhaps it's just as well.


The ones we used are really not dramatically different; I just thought the too big ones looked a little more rustic. Incidentally, you could also buy the super cheap (under $2 each) brackets to make this a really low cost project.

We hung up the shelves over the kids' desk:


And then I put some of the stuff that had been hanging out on the desk on the shelves, to make them look pretty....for now, until I let the kids take them over and they are filled with lego airplanes instead.


This is the desk, by the way (I have a few more little things to do in their room, and then I need to take updated pictures of it). I found it at the thrift store for $50. The thrift store had it labeled an "Abe Lincoln desk" for reasons I cannot guess. Anyway, it's a cool old desk. And HUGE. We had to take the top off to get it through their door.


Look how clean it is now! (well, was. It's been a good half an hour since I've been upstairs to check on it).

Sharing with:
Funky Junk Interior's Saturday Nite Special
Under the Table and Dreaming's Sunday Showcase Party
Tuesday's Treasures at My Uncommon Slice of Suburbia
Tutorials and Tips at Home Stories AtoZ
TwelveOEight's Pretty Things Link Party
Hookin' Up With House of Hepworths
Design, Dining, and Diaper's Inspiration Gallery
Chic on a Shoestring's Flaunt It Friday
The Shabby Nest's Frugal Friday
Tatertots and Jello's Weekend Wrap-up Party
Classy Clutter's Spotlight Saturday
Creating With the Stars at East Coast Creative

Tuesday, October 30, 2012

Bargain!

How about a post that doesn't require me to wrestle with my card reader problems, because the stuff it's about isn't in my house yet!? Yay!

I've been holding off on ordering the bunk bed for Milo and August's room, but I checked Target's website the other day and discovered that the set I was eyeing was on clearance.

It's the "Wrangler Bunk Bed" in espresso. The material is listed as "wood composite," so it's not the nicest bed in the whole world or anything, but it looks good in the picture, and the one review on the site has positive things to say.

The two other bunk beds I considered were this black metal one, also from Target:


This is pretty much exactly like the loft bed Milo sleeps in now, only bunk beds. It's on clearance for $107, so it's main selling point was price. But I really wanted something that at least looked like wood for the forest room.

And then I thought about this one from Ikea:


The price ($159) is good, and it's real pine....but I would have to paint or stain it, and I already have a pretty big line up of things waiting to be painted or stained.

So when the Wrangler, with its awesome cowboy name, went on clearance I was sold. It's marked down to $169 from $199, so not a super dramatic price change, BUT! Target.com was also having a sale wherein you got 15% off if you spent over $125. And on top of that I could use my Target card for 5% off and free shipping. So my final price after tax was $146.87. Cheaper than the Ikea bed! And close enough to the cost of the metal bed to make me feel good about paying a little more for the one I wanted.

And on top of that, I can still Craigslist the loft beds. The metal one is almost brand new is for sale on Target's website right now for $150, I think (it was on sale when we bought it, so we didn't pay that much). I'm thinking I'll try listing it for $90 or so and see what happens. And then maybe $75 or so for the one with the slide. It's older, but it's still in pretty good shape...and it has a slide! If I actually get close to that for them, I'll be breaking even on trading them in for the bunk bed.

Tuesday, October 23, 2012

House Tour: Milo and August's Room

Blogging goal for the....week? Next two weeks? ....is to finish up a house tour series--one of those ones wherein I show the rooms we haven't touched as well as the ones we've whipped somewhat into shape. And the ones like today's, which are sort of in between. (This will be an easier goal to accomplish if my *#$%^^^ing card reader would cooperate. I think that the card reader KILLED my old memory card. And I think the new card reader is already screwed up. I hate them. I got today's pictures by using the card reader that's built into the upstairs computer, the one that is mostly for kids to play Minecraft on, but that is a pain to do. I want a functioning card reader down here! Damnit).

Kid rooms were the first ones to get painted when we moved in, but now they're kind of in stasis. Yet I feel like they could be finished (or, you know, finished enough for now) without a whole lot of time or effort; it's just a matter of getting around to stuff. So maybe these posts will motivate us to get around to stuff.

When I saw this room:


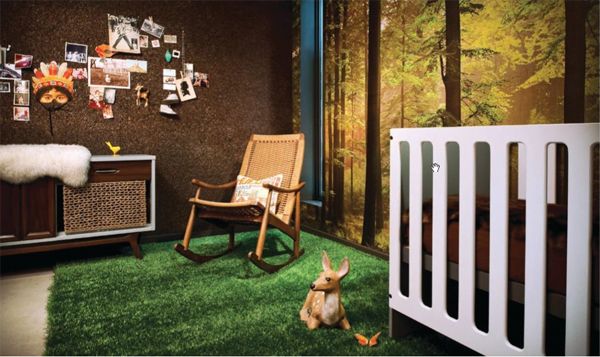
featured on The Lettered Cottage awhile back, I knew I needed a forest room somewhere in the new house. And, fortunately, Gus and Milo were as into it as I was, and agreed to be the lucky forest room residents.

Here is what we have so far:


The bed is a "junior loft bed" from Target's web site. It looks like they're not selling it anymore, but have one that's basically the same except silver instead of black. It was on sale for just over $100 when we bought it, IIRC. The comforters are also from Target--Room Essentials Tulip Comforter--last I saw it's on clearance in the stores right now (not on the website); it wasn't when we bought them, so it looks like we paid around $20 each for the comforter/pillow sham sets. And the bed making is Dave's doing....I'm too pregnant to climb up there and do it, even for blog photography purposes. The paint, like in the kid bathroom, is Martha Stewart's Saguaro Green. Curtains are from Target (I know they're pulled out of the way so you can't really see them, and I just bought one panel per window for cost cutting purposes. They're brown and stripey). We used shelves we already had for the under bed toy/book storage...the one with the baskets is from a garage sale, orginally, and the other one is from Target. More on the wall mural later.


I'm still in love with this light fixture. We took down the old, builder grade ceiling fan and put this up. Gus is not  supposed to have fans in his room because of his dust mite allergy, plus this is pretty and the fan wasn't. I'm pretty sure that we got this at Lowe's and that it was right around $100, but I can't find it now. It looks an awful lot like this one that sells for $270 at Lighting Showroom, though, so it looks like we got a decent deal on it.


Gus' side of the room. We've had this loft bed for years....in our old  house we had a mattress on the floor under it and used it as bunk beds. It originally had a slide and a tent on top. We still have the slide in the garage, but there's not really enough floor space for it here. 


Both kid bedrooms are pretty much the same size--around 12 by 13, I think. We opted for this to be the shared room because it has two closets in it. And because there's not a whole lot of wall space left after the beds are in there (and we didn't want to cover up too much of the wall mural), we opted for
storing all the clothes in the closets instead of having dressers. So each closet has one of these shelves for non hanging clothes, with cubbies for shirts, pants, etc., and then the bins that slide out for pajamas and underwear/socks. Oh, see those little wooden balls on a cord? Those are strings of lights that we haven't gotten around to hanging up yet.


A very exciting picture of the wall of closets. We may take the doors down and put curtains up here, because no one likes bifold doors, right? Although these work fine for the time being.

Under bed storage.

Okay, so! Future plans! Even though we just got the one loft bed, I've talked the boys into a regular bunk bed instead. I'm just not thrilled with how the two beds take up so much space in the room. If they were regular twin beds instead of loft beds, I'd be fine with how they look but not with how little space would be left for toys. I did float an idea to do twin beds and keep the toys on shelves in the hallway outside (where there's a lot of unused space), but they didn't go for it.

So we're planning to sell the loft beds and buy a basic set of wooden bunk beds, which will go on the wall opposite the windows. They really want a desk, so I'm thinking that will go between the windows, and then we'll consolidate toys (and probably bring most of the books down to the library--fewer books is also a good thing with a dust mite allergy) and have a corner for toy storage.

There's not really a whole lot of wall space left with the wall mural plus bunk beds plus the two windows plus the closets, but we bought this at Ikea the other day anyway, in hopes that we can find somewhere to hang it:

Why, when I type it all out, it sounds so simple! The loft bed/bunkbed switch is so easy (and I'm guessing we can sell the loft beds on Craiglist for more than half of what the bunk beds will cost), but I think it will really make the room look a lot bigger. And give us an excuse for a toy purge, since blocks and legos are about the only things that get played with these days anyway. And Snap Circuits. And board games, but they live downstairs.

About the wall mural: in case anyone is out there thinking, "I want MY house to look like a dentist's office from 1984, too!" This was from Amazon, and it came in 8 big panels with a packet of glue to mix up. We lined them all up on the floor in our bedroom first, then Dave hung them up and smoothed them out while I got the glue mixed and applied to the next panel. It was kind of a pain, and the finished project is far from perfect (as far as wrinkles and things lining up perfectly), but it was fairly quick (it took maybe 2 hours all together) and the kids are happy with it. It definitely makes the room more...interesting than it would be otherwise. I'm a little terrified at the thought of ever trying to get it off the wall, but with luck it will be awhile before they get tired of it.